Ever wonder why some drone footage looks incredibly smooth and cinematic, while other aerial shots appear harsh, overexposed, or oddly sharp? The secret often lies in a small but mighty accessory: Neutral Density (ND) filters. These crucial tools empower drone pilots to achieve professional-grade results, transforming ordinary footage into breathtaking aerial masterpieces. This comprehensive guide will explore what ND filters are, why they are indispensable for drone photography and videography, how different types work, and how to select the perfect ones for your aerial adventures.
What Are ND Filters for Drones? An Overview
Neutral Density (ND) filters are essentially like high-quality sunglasses for your drone’s camera lens. Their primary function is to reduce the amount of light that reaches the camera sensor without altering the color balance of your image. This light reduction provides photographers and videographers with greater control over exposure settings, especially in bright lighting conditions.
The concept of light reduction has existed in traditional photography for decades, evolving from bulky, specialized equipment to compact, precision-engineered filters designed specifically for drone cameras. Unlike sunglasses which simply make everything darker for your eyes, ND filters are engineered to be “neutral,” meaning they diminish light intensity uniformly across the spectrum, preserving the true colors of your scene.
The Indispensable Role of ND Filters in Drone Cinematography
Why are ND filters considered a must-have accessory for serious drone pilots? They unlock creative possibilities and solve common exposure challenges that drones face in bright outdoor environments.
Controlling Exposure in Bright Conditions
|
Our Picks for the Best Drone in 2026
As an Amazon Associate I earn from qualifying purchases.
|
||
| Num | Product | Action |
|---|---|---|
| 1 | DJI Mini 3 Fly More Combo (DJI RC), Drones with Camera for Adults 4K, 3 Batteries for 114-min Flight Time, Vertical Shooting, 32800ft (10km) Video Transmission, Lightweight Mini Drone for Beginners |

|
| 2 | DJI Air 3S Fly More Combo (RC 2 Screen Remote Controller), Drone with 1" CMOS Wide-Angle & Medium Tele Camera for Adults, 4K/60fps, Omnidirectional Sensing & 3 Batteries for Extended Flight Time |
|
| 3 | GPS Drones with Camera for Adults 4K, FPV Drone Under 249g with Brushless Motor, GPS Auto Return, Follow Me, Circle Fly, Waypoint Flight, Foldable Drone with Gesture Control, 46Mins with 2 Batteries |
|
| 4 | Drone with Camera 1080P HD FPV Foldable Mini Drone for Beginners Kids Adults, Drone with One Key Take Off/Landing, Gesture Selfie, Altitude Hold, 3D Flip, Easy to Fly, 2 Batteries, Toys for Boys Girls |
|
| 5 | Drone with Camera for Adults 4K, Brushless Motor Drones for Kids Beginners, 60 Mins Flight, 130° Lens, FPV Foldable RC Quadcopter, Gesture Photography, Toys Gifts for Teen Boys Girls, Black |
|
| 6 | Drone with Camera - Drone with Screen on Controller for Beginners, Foldable Remote Control Quadcopter with Gesture Control, 3D Flip, One Key Start, Emergency Stop, 2 Batteries, Easier to use to use |
|
| 7 | DJI Mini 4K, Drone with 4K UHD Camera for Adults, Under 249 g, 3-Axis Gimbal Stabilization, 10km Video Transmission, Auto Return, Wind Resistance, 1 Battery for 31-Min Max Flight Time, Intelligent |
|
| 8 | Drone with Camera, Drones for Adults and Beginners, 1080P HD FPV Foldable Mini Drones for Kids, with 2 Batteries, Carrying Case, Trajectory Flight, Gravity Control, One-Key Takeoff/Landing, 360° Flip, Toys for Gift |
|
| 9 | Drone with 1080P Camera - Foldable Remote Control Quadcopter with Gesture Control, 3D Flip, One Key Start, Emergency Stop, 2 Batteries, Easier to use, Toy for Kids Adult Beginners |
|
| 10 | DJI Mini 4K Camera Drone Combo, Drone with 4K UHD Camera for Adults, Under 249 g, 3-Axis Gimbal Stabilization, 10km Video Transmission, Auto Return, 2 Batteries for 62-Min Max Flight Time, QuickShots |
|
Drones often operate in open, brightly lit environments where the camera’s sensor can easily become overwhelmed by excessive light. This leads to overexposed images with “blown-out” highlights, where details in bright areas (like the sky or reflective surfaces) are lost. ND filters reduce the incoming light, allowing the camera to capture a properly exposed image without sacrificing detail. They act as a critical buffer, enabling your drone’s camera to handle intense sunlight, ensuring your shots maintain a balanced exposure.
Achieving Cinematic Motion Blur (The 180-Degree Rule)
One of the most significant reasons professional drone videographers use ND filters is to achieve a natural, cinematic motion blur. This effect is governed by the “180-degree shutter rule,” a fundamental principle in filmmaking. The rule states that your shutter speed should ideally be double your frame rate for natural-looking motion blur. For instance, if you’re shooting video at 24 frames per second (fps), your shutter speed should be approximately 1/50th of a second.
In bright daylight, a shutter speed of 1/50th of a second would typically result in severely overexposed footage. ND filters solve this by reducing the light, allowing you to use that slower shutter speed without overexposure. This creates a subtle blur in moving objects, making your footage appear smoother, more fluid, and professional, rather than jerky or “jittery.”
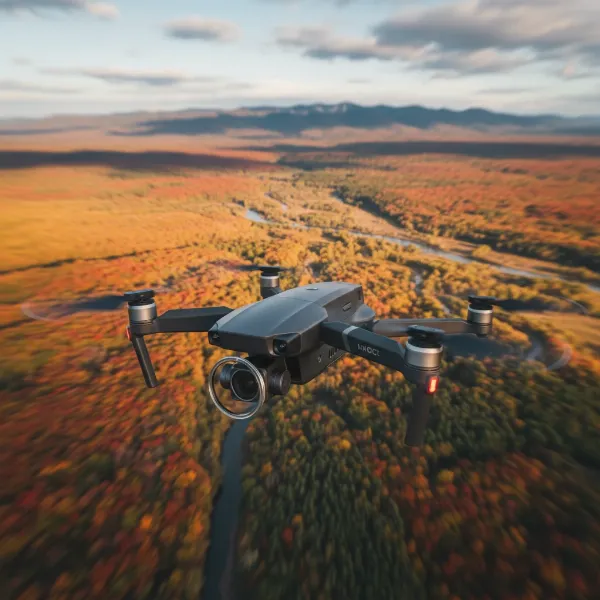 Drone with ND filter capturing cinematic motion blur over a landscape.
Enhancing Color and Contrast
Beyond exposure control, ND filters can significantly improve the overall image quality by enhancing colors and contrast. By reducing the intensity of bright light, they help mitigate glare from reflective surfaces like water, glass, or polished buildings. This reduction in glare leads to richer, more vibrant colors and sharper contrasts, especially when capturing distant landscapes or cityscapes that might otherwise appear washed out or hazy.
Managing Depth of Field
While many consumer drones feature fixed-aperture lenses, for those with adjustable apertures, ND filters offer additional creative control. In bright conditions, to prevent overexposure, you might be forced to use a very small aperture (high f-number). With an ND filter, you can open up the aperture (use a lower f-number) to achieve a shallower depth of field. This technique allows you to isolate your subject against a beautifully blurred background, adding a professional, three-dimensional quality to your aerial stills.
Types of ND Filters for Drones
Understanding the different types of ND filters is crucial for choosing the right tools for your specific needs.
- Fixed ND Filters: These filters provide a constant, non-adjustable level of light reduction. They are labeled with numbers like ND4, ND8, ND16, ND32, or ND64. Fixed ND filters are reliable and provide consistent results once you’ve identified the appropriate strength for your lighting conditions. They are ideal for situations with stable light.
- Variable ND (VND) Filters: A VND filter combines two polarizing filter elements that can be rotated against each other to adjust the amount of light reduction. This offers incredible versatility, allowing you to dial in the exact “stop” reduction needed without constantly swapping filters. However, some VNDs, particularly at their extreme settings, can introduce an undesirable “X” pattern or color shifts in your footage.
- ND/PL (Polarizer) Filters: These are hybrid filters that combine the light-reducing capabilities of an ND filter with the glare-reducing and color-enhancing properties of a polarizer filter. They are excellent for cutting reflections from water or windows, enhancing sky blues, and making clouds pop, while also controlling overall exposure.
Decoding ND Filter Strengths: What the Numbers Mean
ND filters are categorized by their light-stopping power, indicated by a numerical value. Understanding these numbers is key to selecting the right filter.
ND filter values represent a fraction of the light transmitted or the number of “stops” of light reduced:
- ND2 (1 stop): Reduces light by half.
- ND4 (2 stops): Reduces light to 1/4.
- ND8 (3 stops): Reduces light to 1/8.
- ND16 (4 stops): Reduces light to 1/16.
- ND32 (5 stops): Reduces light to 1/32.
- ND64 (6 stops): Reduces light to 1/64.
Each “stop” of light reduction effectively halves the amount of light entering the lens. This allows you to correspondingly double your shutter speed (or open your aperture wider) to maintain proper exposure.
Matching Filters to Conditions
The choice of ND strength depends directly on the ambient light and your desired effect:
- Overcast/Golden Hour (Low to Moderate Light): ND4, ND8
- Partly Cloudy/Bright Afternoon: ND16
- Sunny Day (Standard Conditions): ND16, ND32
- Very Bright/Midday Sun/Snow/Water: ND32, ND64, or even higher.
For most drone pilots aiming for cinematic video, a set including ND16, ND32, and ND64 will cover a wide range of daylight shooting scenarios.
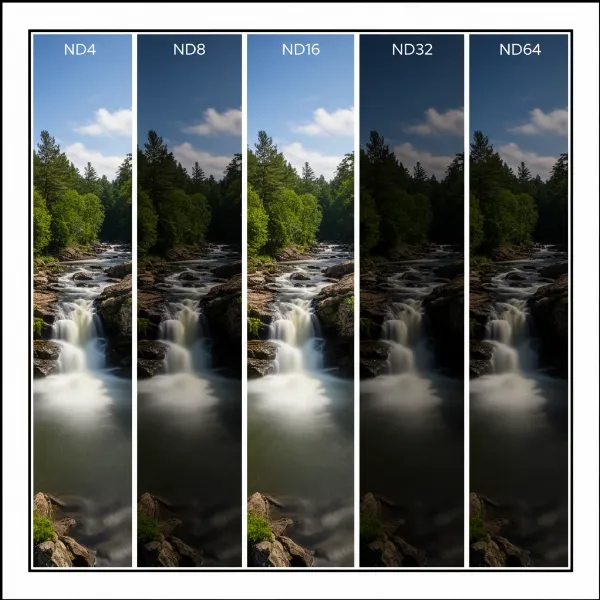 Comparison of various ND filter strengths for drones in different lighting.
Choosing the Right ND Filters for Your Drone
Selecting the ideal ND filters involves considering your specific drone model, the environments you typically fly in, and your creative goals.
First, ensure compatibility with your drone. Filters are designed for specific drone cameras and models. Always check that the filters you purchase are made for your particular DJI Mavic, Mini, Air, or other drone series.
Second, assess your primary shooting environment. If you often fly in bright, sunny locales or over reflective surfaces like water or snow, stronger filters (ND32, ND64, or ND/PL combinations) will be essential. For more varied conditions, a comprehensive set offering a range of strengths is advisable.
Third, determine your creative intent. Are you primarily shooting cinematic video requiring smooth motion blur? Or do you focus on long-exposure photography to capture ethereal landscapes? Your artistic vision will guide the filter strengths you need. For drones with fixed apertures, like many consumer models, ND filters become your primary tool for managing light in conjunction with shutter speed and ISO.
Investing in a quality set from reputable manufacturers known for optical clarity will ensure your footage remains sharp and true to color.
Essential Tips for Using ND Filters with Your Drone
Using ND filters effectively requires a little practice and adherence to some fundamental principles.
- Always Shoot in Manual Mode: To prevent your drone’s camera from automatically adjusting exposure and negating the filter’s effect, switch your camera settings to manual mode. This gives you full control over ISO, shutter speed, and white balance.
- Set Frame Rate First, Then Shutter Speed: For video, decide your desired frame rate (e.g., 24fps, 30fps). Then, apply the 180-degree rule to determine your target shutter speed (e.g., 1/50s for 24fps).
- Monitor Your Exposure: Before taking off, or at least before starting a critical shot, observe your drone’s camera feed and its exposure meter. Adjust the ND filter strength or fine-tune your ISO until the exposure is balanced, aiming for a “0.0 EV” reading if available, or slightly underexposed for easier recovery in post-production.
- Attach and Detach Carefully: Drone gimbals are delicate. Always power off your drone before attaching or removing filters to prevent potential damage. Handle filters by their edges to avoid fingerprints.
- Keep Your Filters Spotless: A tiny smudge or dust particle on an ND filter can significantly degrade image quality. Always clean your filters with a microfiber cloth and lens cleaner before each flight.
> “ND filters aren’t just accessories; they’re an extension of your creative vision, allowing you to paint with light and motion in ways that would be impossible otherwise.” – Jane Doe, Professional Drone Cinematographer
Conclusion
ND filters are no longer a niche accessory but an indispensable tool for any drone pilot serious about elevating their aerial photography and videography. By mastering their use, you gain unparalleled control over exposure, achieve breathtaking cinematic motion blur, and enhance the overall visual quality of your drone footage. They empower you to overcome the challenges of bright outdoor lighting, unlock creative possibilities, and consistently produce professional-grade results.
So, whether you’re capturing sprawling landscapes, dynamic action sequences, or simply striving for that perfect cinematic look, investing in a quality set of ND filters is one of the most impactful upgrades you can make to your drone kit. Experiment with different strengths, understand their impact, and watch your aerial content soar to new heights. What creative projects will you unlock with the perfect ND filter?
Frequently Asked Questions
Are ND filters necessary for all drone pilots?
While not strictly “necessary” for every single flight, ND filters are highly recommended for any drone pilot serious about achieving high-quality photos and especially cinematic videos. They are essential for controlling exposure in bright conditions and enabling the motion blur critical for professional-looking footage.
Can I use ND filters for drone photography, or just video?
ND filters are beneficial for both drone photography and videography. For photography, they enable longer exposure times in daylight, allowing for creative effects like smoothing water or blurring clouds. For video, they are crucial for adhering to the 180-degree shutter rule and achieving natural motion blur.
What is the “180-degree rule” in drone videography?
The 180-degree rule is a filmmaking guideline suggesting that your camera’s shutter speed should be approximately twice your frame rate to create natural-looking motion blur. For example, if your drone is recording at 24 frames per second (fps), your ideal shutter speed would be 1/50th of a second.
How do I know which ND filter to use?
Choosing the right ND filter depends on the ambient light conditions and your desired effect. Start by setting your camera to manual mode and your desired frame rate/shutter speed (following the 180-degree rule for video). Then, select an ND filter that brings your exposure meter to a balanced level, typically around “0.0 EV” or slightly underexposed. Stronger filters (higher numbers) are for brighter conditions.