Few things are as frustrating for a drone pilot as watching their beloved aircraft refuse to hold steady, stubbornly veering off course. Whether it’s a slight wobble or a significant sideways slide, drone drift can quickly turn an exciting flight into a disheartening struggle. You’ve invested in your drone, honed your flying skills, and expect precision, but when your drone starts drifting to the side, it signals an underlying issue that needs immediate attention. This comprehensive guide, informed by over a decade of hands-on drone expertise, will help you diagnose why your drone is drifting and provide actionable solutions to get it flying straight and true again.
Understanding Drone Drift: What Causes It?
Drone drift is essentially the unauthorized movement of your drone in any direction—forward, backward, or to the side—without explicit input from the pilot. While a small amount of drift can be expected in certain conditions, especially with basic models or in GPS-denied environments, excessive or consistent sideways movement points to a problem. This issue can stem from a variety of sources, broadly categorized into mechanical failures, software or sensor malfunctions, environmental factors, or even incorrect controller settings. Identifying the root cause is the first step toward restoring your drone’s stability and ensuring safe, enjoyable flights.
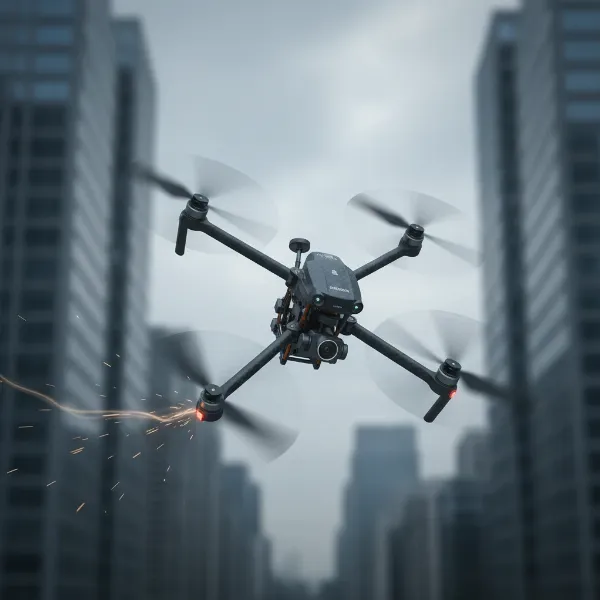 Conceptual image of a drone tilting or drifting sideways, indicating instability.
Mechanical Culprits: Propellers, Motors, and Balance
The physical integrity of your drone is paramount to its stable flight. Any imbalance or malfunction in its propulsion system can directly lead to unwanted drifting.
Damaged or Worn Propellers
|
Our Picks for the Best Drone in 2026
As an Amazon Associate I earn from qualifying purchases.
|
||
| Num | Product | Action |
|---|---|---|
| 1 | GPS Drones with Camera for Adults 4K, FPV Drone Under 249g with Brushless Motor, GPS Auto Return, Follow Me, Circle Fly, Waypoint Flight, Foldable Drone with Gesture Control, 46Mins with 2 Batteries |

|
| 2 | DJI Mini 4K, Drone with 4K UHD Camera for Adults, Under 249 g, 3-Axis Gimbal Stabilization, 10km Video Transmission, Auto Return, Wind Resistance, 1 Battery for 31-Min Max Flight Time, Intelligent |
|
| 3 | DJI Air 3S Fly More Combo (RC 2 Screen Remote Controller), Drone with 1" CMOS Wide-Angle & Medium Tele Camera for Adults, 4K/60fps, Omnidirectional Sensing & 3 Batteries for Extended Flight Time |
|
| 4 | DJI Mini 4K Camera Drone Combo, Drone with 4K UHD Camera for Adults, Under 249 g, 3-Axis Gimbal Stabilization, 10km Video Transmission, Auto Return, 2 Batteries for 62-Min Max Flight Time, QuickShots |
|
| 5 | Drone with Camera 1080P HD FPV Foldable Mini Drone for Beginners Kids Adults, Drone with One Key Take Off/Landing, Gesture Selfie, Altitude Hold, 3D Flip, Easy to Fly, 2 Batteries, Toys for Boys Girls |
|
| 6 | DJI Mini 3 Fly More Combo (DJI RC), Drones with Camera for Adults 4K, 3 Batteries for 114-min Flight Time, Vertical Shooting, 32800ft (10km) Video Transmission, Lightweight Mini Drone for Beginners |
|
| 7 | Drone with 1080P Camera - Foldable Remote Control Quadcopter with Gesture Control, 3D Flip, One Key Start, Emergency Stop, 2 Batteries, Easier to use, Toy for Kids Adult Beginners |
|
| 8 | Drone with Camera for Adults 4K, Brushless Motor Drones for Kids Beginners, 60 Mins Flight, 130° Lens, FPV Foldable RC Quadcopter, Gesture Photography, Toys Gifts for Teen Boys Girls, Black |
|
| 9 | Drone with Camera - Drone with Screen on Controller for Beginners, Foldable Remote Control Quadcopter with Gesture Control, 3D Flip, One Key Start, Emergency Stop, 2 Batteries, Easier to use to use |
|
| 10 | Drone with Camera, Drones for Adults and Beginners, 1080P HD FPV Foldable Mini Drones for Kids, with 2 Batteries, Carrying Case, Trajectory Flight, Gravity Control, One-Key Takeoff/Landing, 360° Flip, Toys for Gift |
|
Propellers are your drone’s wings, and even minor damage can have a major impact. A tiny crack, a slight bend, or excessive wear on one propeller can create an uneven lift, forcing your drone to compensate and resulting in a sideways drift. Always inspect your propellers before each flight for any signs of damage. If you find any, replace the entire set to ensure balanced thrust.
Incorrectly Installed Propellers
Many drones use specific “A” and “B” type propellers that must be installed on corresponding motor arms. Mixing them up will cause chaotic and uncontrollable flight, often manifesting as severe drifting or flipping immediately after takeoff. Double-check your drone’s manual to ensure each propeller is on the correct motor.
Malfunctioning Motors
The motors are the heart of your drone’s propulsion system, spinning at thousands of revolutions per minute. If one motor is faulty—spinning slower, faster, or inconsistently compared to the others—it will generate uneven thrust. This imbalance directly causes the drone to tilt and drift. Listen for unusual noises, check for excessive heat, or feel for sluggishness in individual motors. Debris accumulation can also impede motor performance, making regular cleaning essential.
Uneven Weight Distribution/Balance Issues
Drones are meticulously designed for balanced flight. Any alteration to their center of gravity can induce drift. This could be something as simple as a poorly placed sticker, an unevenly mounted payload (like a camera or accessory), or even an asymmetrical repair. Ensure all attachments are centrally located and securely fastened to maintain an even weight distribution across the drone’s frame.
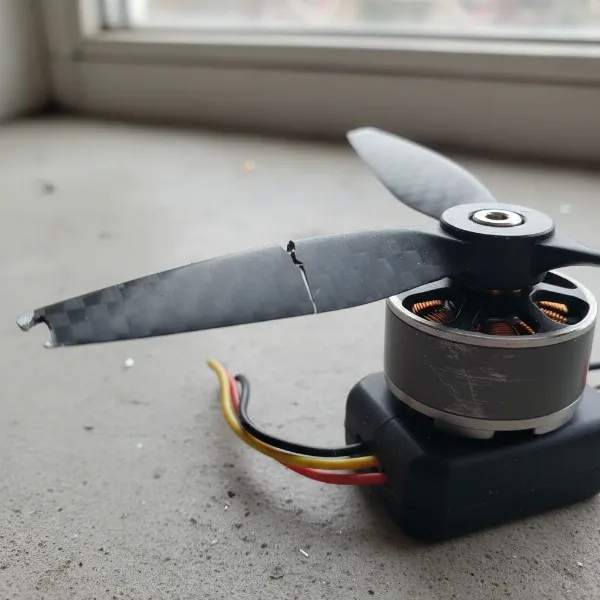 Close-up of a damaged drone propeller and a motor with minor wear, illustrating mechanical issues causing drift.
Software and Sensor Glitches: The Brains Behind the Flight
Beyond physical components, your drone’s internal sensors and software play a critical role in maintaining stable flight. When these systems are out of sync, your drone can lose its sense of “level” or its position, leading to drift.
Accelerometer/IMU Calibration Issues
The Inertial Measurement Unit (IMU), which includes accelerometers and gyroscopes, tells your drone about its orientation and movement. If the IMU is improperly calibrated, the drone might incorrectly perceive its own “level” state. This often happens if the drone is turned on or calibrated on an uneven surface. As a result, the drone will constantly try to correct for a tilt that isn’t actually there, leading to persistent drifting. Regular calibration on a perfectly flat surface is crucial.
Compass Calibration
While less directly related to sideways drift than the accelerometer, an uncalibrated or interfered compass can affect your drone’s ability to maintain a consistent heading, especially when relying on GPS for position hold. If the drone struggles to know which way it’s facing accurately, it might wander.
Flight Controller (FC) Orientation (for DIY/FPV)
For custom-built or FPV drones, the flight controller’s orientation setting in the configuration software (like Betaflight) must match its physical mounting on the drone. If the software thinks the FC is mounted differently than it actually is, the drone will misinterpret its movements, leading to severe instability and drift.
Outdated Firmware
Drone manufacturers frequently release firmware updates to improve flight stability, add features, and fix bugs. An outdated firmware version might contain known issues that cause drift. Always ensure your drone’s firmware is up to date, as this simple step can often resolve complex flying problems.
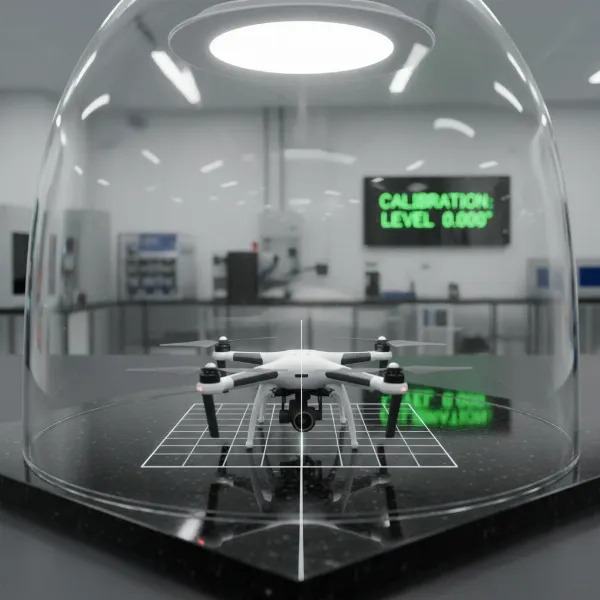 A drone placed on a perfectly flat surface, ready for IMU or accelerometer calibration, symbolizing software fixes.
Controller and External Factors: Pilot Input and Environment
Sometimes, the drift isn’t a drone fault but an interaction with its environment or an oversight in controller settings.
Incorrect Transmitter (Controller) Trim Settings
Your remote controller has “trim” buttons or digital settings that allow for fine-tuning the drone’s hover. If these trims are accidentally adjusted or set incorrectly, they can continuously command the drone to move in one direction. For example, if the roll trim is set to the left, the drone will continuously drift left. Resetting trims to neutral or making small adjustments can often resolve minor drift.
Weak GPS Signal or Interference
Modern drones heavily rely on GPS to maintain a stable position. If the GPS signal is weak, obstructed (e.g., flying indoors, near tall buildings, or under dense tree cover), or experiencing electromagnetic interference (from power lines, Wi-Fi routers, etc.), the drone might struggle to hold its position accurately and begin to drift. Flying in an open area with a strong GPS lock is always recommended.
Wind Conditions
Even a slight breeze can push a lightweight drone off course, causing it to drift. While high-end drones have advanced wind resistance capabilities, no drone is entirely immune. If you notice drift predominantly in windy conditions, it might simply be the drone struggling against the elements. Always check weather conditions before flying and consider your drone’s wind resistance limits.
Uneven Launch Surface
Just like calibrating the IMU on an uneven surface, taking off from one can cause initial instability. The drone’s sensors establish a baseline at takeoff, and if this baseline is skewed, the drone will immediately try to correct for a perceived tilt, leading to drift. Always launch your drone from a flat, level surface whenever possible.
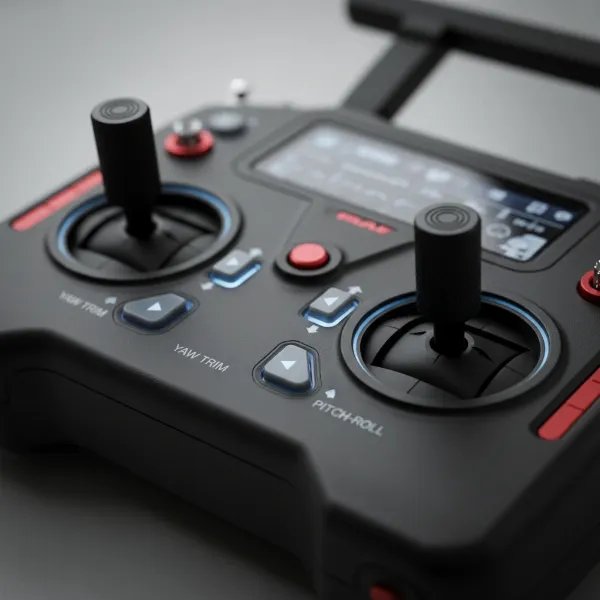 Close-up of a drone remote controller with specific trim buttons highlighted, symbolizing manual adjustments and control.
Step-by-Step Troubleshooting Guide to Fix Drone Drift
When your drone starts drifting, a systematic approach to troubleshooting is your best bet. Here’s how to tackle the problem:
-
Perform a Thorough Physical Inspection:
- Propellers: Check each blade for cracks, bends, chips, or wear. Replace all propellers if any damage is found. Ensure they are correctly installed (A/B types on correct motors).
- Motors: Gently spin each motor by hand. Do they feel smooth, or do you notice any grinding or resistance? Look for debris and clean them carefully. Listen for unusual sounds during startup or hover.
- Landing Gear & Frame: Check for any bent or broken components that might affect overall balance.
- Payloads/Accessories: Confirm all attached items (cameras, guards, batteries) are securely and centrally mounted.
-
Calibrate Your Drone’s IMU/Accelerometer:
- Place your drone on a perfectly flat, level, and stable surface.
- Power on your drone and remote controller.
- Access the drone’s accompanying app or flight controller software (e.g., DJI Fly, Autel Explorer, Betaflight).
- Navigate to the sensor or calibration settings.
- Follow the on-screen instructions to perform an IMU/Accelerometer calibration. Some drones require you to rotate the drone through various orientations (nose up, nose down, left side up, right side up, upside down) during the process. Keep the drone absolutely still during each step.
- Important: Avoid metal objects or strong magnetic fields during calibration.
-
Check and Adjust Controller Trim Settings:
- With the drone powered on and linked to the controller, ensure your trim settings are centered or reset to neutral.
- Take off in a calm environment. If the drone still drifts, make very small, incremental adjustments to the opposite trim direction until it hovers steadily.
- Remember to save trim settings if your controller allows.
-
Verify GPS Signal and Flight Environment:
- Before takeoff, ensure your drone has acquired a strong GPS lock (usually indicated by blinking lights or an icon in the app).
- Fly in an open area, away from tall buildings, dense foliage, power lines, or other sources of electromagnetic interference.
- Avoid flying in strong winds, especially with smaller or lighter drones.
-
Update Firmware:
- Connect your drone to its dedicated app or computer software.
- Check for any available firmware updates for the drone and, if applicable, the remote controller.
- Follow the manufacturer’s instructions carefully to perform the update.
-
Advanced Troubleshooting (For Experienced Pilots/DIY Drones):
- Flight Controller Orientation: If you have a custom-built drone, verify the FC orientation settings in your flight controller software (e.g., Betaflight, ArduPilot).
- PID Tuning: For advanced users, adjusting the drone’s PID (Proportional, Integral, Derivative) values can fine-tune flight characteristics. However, this is a complex process and incorrect adjustments can worsen stability or damage motors. Start with minor increases to the ‘I’ (Integral) setting if drift persists, but proceed with extreme caution.
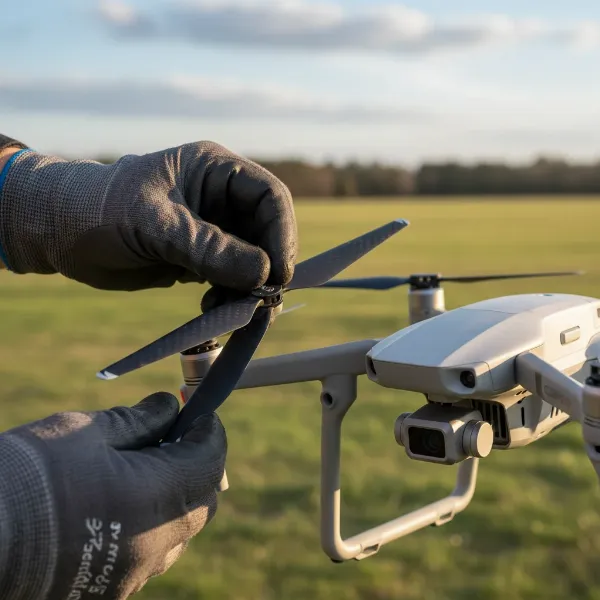 Hands performing a detailed pre-flight inspection on a drone, checking propellers and motors for issues.
Preventative Measures for Stable Drone Flights
Prevention is always better than cure. By adopting good habits, you can significantly reduce the chances of your drone developing a drift problem.
- Regular Pre-Flight Checks: Make a habit of inspecting your drone thoroughly before every flight. This includes checking propellers, motors, battery seating, and overall frame integrity.
- Calibrate Consistently: Calibrate your IMU/accelerometer and compass before each flight, especially if you’re flying in a new location or after a firmware update.
- Fly in Suitable Conditions: Avoid flying in strong winds, rain, or areas with known electromagnetic interference.
- Maintain Even Weight Distribution: When attaching accessories or payloads, always strive for central and balanced placement.
- Keep Firmware Updated: Regularly check for and install the latest firmware updates from your drone’s manufacturer to ensure optimal performance and bug fixes.
- Handle with Care: Treat your drone gently. Hard landings, crashes, or rough handling can damage internal sensors and mechanical components, leading to drift.
Conclusion
Encountering drone drift can be a perplexing issue, but with a systematic approach to troubleshooting, it’s often a fixable problem. By meticulously checking your propellers, inspecting your motors, performing essential calibrations, understanding your controller’s settings, and being mindful of environmental factors, you can diagnose and resolve most drift-related problems. Remember that stable flight comes from a harmonious balance of mechanical integrity, precise sensor data, and accurate pilot input. With these insights, you’re well-equipped to get your drone back to hovering flawlessly and reclaim the joy of smooth, controlled flight. Happy flying, and may your drone always fly true! What steps will you take first to ensure your drone maintains its perfect hover?
Frequently Asked Questions
How often should I calibrate my drone’s accelerometer?
It’s generally recommended to calibrate your drone’s accelerometer and IMU before each flight, especially if you’re flying in a new location or if the drone has experienced a hard landing. This ensures the drone’s sensors have an accurate understanding of its level position, which is crucial for stable flight.
Can wind really cause my drone to drift sideways, even with GPS?
Yes, even drones with advanced GPS systems can experience drift in windy conditions. While GPS helps the drone maintain its horizontal position, strong gusts can still physically push the drone, requiring its flight controller to constantly compensate. Smaller, lighter drones are particularly susceptible to wind-induced drift.
What is the difference between accelerometer and compass calibration?
Accelerometer calibration teaches your drone what “level” means, ensuring it understands its orientation relative to the ground. Compass calibration, on the other hand, helps your drone accurately determine its heading (which way is north) and avoid magnetic interference, which is vital for navigation and features like “Return to Home.”