As a seasoned drone technician with over a decade of experience, I’ve witnessed the evolution of aerial photography, and one truth remains constant: light is everything. While drones offer unparalleled perspectives, truly exceptional imagery often hinges on harnessing the perfect natural lighting conditions. The “Golden Hour” and “Blue Hour” are renowned among photographers for their magical qualities, transforming ordinary scenes into breathtaking visuals. Mastering these fleeting moments with your drone can elevate your aerial photography from good to genuinely outstanding, capturing unparalleled depth, color, and mood. This comprehensive guide will illuminate the science behind these special times, provide essential drone settings, offer expert flying tips, and address common challenges, ensuring your drone shots always shine.
What is the Golden Hour (Magic Hour)?
|
Our Picks for the Best Drone in 2026
As an Amazon Associate I earn from qualifying purchases.
|
||
| Num | Product | Action |
|---|---|---|
| 1 | Drone with 1080P Camera - Foldable Remote Control Quadcopter with Gesture Control, 3D Flip, One Key Start, Emergency Stop, 2 Batteries, Easier to use, Toy for Kids Adult Beginners |

|
| 2 | Drone with Camera, Drones for Adults and Beginners, 1080P HD FPV Foldable Mini Drones for Kids, with 2 Batteries, Carrying Case, Trajectory Flight, Gravity Control, One-Key Takeoff/Landing, 360° Flip, Toys for Gift |
|
| 3 | DJI Mini 4K Camera Drone Combo, Drone with 4K UHD Camera for Adults, Under 249 g, 3-Axis Gimbal Stabilization, 10km Video Transmission, Auto Return, 2 Batteries for 62-Min Max Flight Time, QuickShots |
|
| 4 | DJI Mini 4K, Drone with 4K UHD Camera for Adults, Under 249 g, 3-Axis Gimbal Stabilization, 10km Video Transmission, Auto Return, Wind Resistance, 1 Battery for 31-Min Max Flight Time, Intelligent |
|
| 5 | DJI Air 3S Fly More Combo (RC 2 Screen Remote Controller), Drone with 1" CMOS Wide-Angle & Medium Tele Camera for Adults, 4K/60fps, Omnidirectional Sensing & 3 Batteries for Extended Flight Time |
|
| 6 | Drone with Camera 1080P HD FPV Foldable Mini Drone for Beginners Kids Adults, Drone with One Key Take Off/Landing, Gesture Selfie, Altitude Hold, 3D Flip, Easy to Fly, 2 Batteries, Toys for Boys Girls |
|
| 7 | DJI Mini 3 Fly More Combo (DJI RC), Drones with Camera for Adults 4K, 3 Batteries for 114-min Flight Time, Vertical Shooting, 32800ft (10km) Video Transmission, Lightweight Mini Drone for Beginners |
|
| 8 | Drone with Camera - Drone with Screen on Controller for Beginners, Foldable Remote Control Quadcopter with Gesture Control, 3D Flip, One Key Start, Emergency Stop, 2 Batteries, Easier to use to use |
|
| 9 | GPS Drones with Camera for Adults 4K, FPV Drone Under 249g with Brushless Motor, GPS Auto Return, Follow Me, Circle Fly, Waypoint Flight, Foldable Drone with Gesture Control, 46Mins with 2 Batteries |
|
| 10 | Drone with Camera for Adults 4K, Brushless Motor Drones for Kids Beginners, 60 Mins Flight, 130° Lens, FPV Foldable RC Quadcopter, Gesture Photography, Toys Gifts for Teen Boys Girls, Black |
|
The Golden Hour, often affectionately termed the “Magic Hour,” refers to the period shortly after sunrise and just before sunset. During this coveted time, the sun sits low on the horizon, typically when it’s between 6 degrees below and 6 degrees above the horizon. The sun’s rays travel through a greater portion of the Earth’s atmosphere, scattering blue light and allowing warmer tones—reds, oranges, and yellows—to dominate. This phenomenon bathes the landscape in a soft, diffused, and incredibly flattering light, giving everything a warm, ethereal glow.
Why is this fleeting window so ideal for drone photography? Unlike the harsh, overhead glare of midday sun, the low-angle light of the Golden Hour creates long, soft shadows that add depth, texture, and dimension to your aerial shots. It naturally highlights contours and shapes, making landscapes, architecture, and subjects appear more vibrant and three-dimensional. The warm color palette also evokes feelings of tranquility, romance, and drama, making your drone footage and photos inherently more captivating.
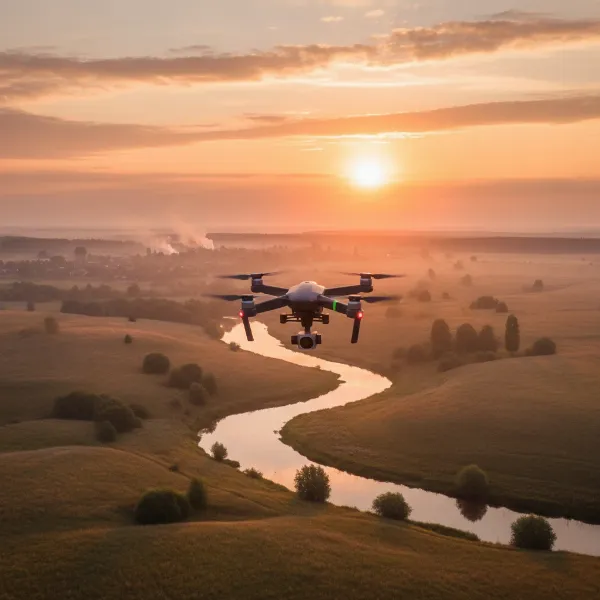 A drone capturing a warm, golden-hour landscape with long shadows and soft, diffused light.
Embracing the Blue Hour
Beyond the golden glow lies another equally mesmerizing period known as the Blue Hour. This unique time occurs in the twilight moments just before sunrise and immediately after sunset, when the sun is well below the horizon but its indirect light still scatters through the atmosphere. Instead of warm hues, the sky takes on a deep, rich indigo or sapphire blue, often with hints of purple or magenta.
The Blue Hour offers a distinct advantage for drone photographers seeking a cooler, more dramatic aesthetic. The diffused, soft blue light provides an incredible backdrop for cityscapes, where artificial lights begin to twinkle, creating a stunning contrast between the deep sky and vibrant urban glow. For landscapes, it imparts a moody, serene, or even mysterious atmosphere, emphasizing silhouettes and subtle textures. It’s a perfect canvas for capturing the transition from day to night or night to day, offering a unique photographic perspective that stands apart from the warmth of the Golden Hour.
Optimizing Your Drone’s Settings for Perfect Lighting
Capturing the nuanced beauty of Golden and Blue Hour light with your drone requires a thoughtful approach to camera settings and equipment. These periods present unique lighting challenges and opportunities that standard daylight settings can’t always handle.
Neutral Density (ND) Filters
For drone videographers, Neutral Density (ND) filters are indispensable during Golden Hour, and often beneficial for stills too. They act like sunglasses for your drone’s camera, reducing the amount of light entering the lens without altering the color. This allows you to maintain a lower shutter speed, adhering to the crucial 180-degree rule for cinematic video (where your shutter speed is roughly double your frame rate, e.g., 1/60th for 30fps video). Without ND filters, the bright Golden Hour sun can lead to overexposed footage or force you to use a fast shutter speed, resulting in choppy, unnatural-looking video. When shooting into the sun, ND filters also help manage glare and lens flare, preserving detail.
Exposure Bracketing (AEB/HDR)
The contrast between bright skies and deep shadows can be significant during sunrise and sunset. This high dynamic range can be challenging for a single exposure to capture perfectly. This is where Exposure Bracketing (AEB) comes into play. Most modern drones, especially DJI models, offer an automatic AEB function, which takes multiple photos (typically 3 or 5) of the same scene at different exposure levels. These can then be combined in post-processing to create a High Dynamic Range (HDR) image, revealing detail in both the brightest highlights and darkest shadows that would otherwise be lost in a single shot. This technique is particularly powerful for capturing the full spectrum of light during Golden Hour.
White Balance Control
The default “Auto White Balance” setting on your drone’s camera can often neutralize the beautiful warm tones of the Golden Hour, making your photos appear cooler and less vibrant than they should. To truly capture that magical glow, switch to a manual white balance setting. “Shade” or “Cloudy” presets can enhance the warmth, or you can manually set a Kelvin temperature, often in the range of 3000K-4000K, to dial in the perfect golden hue. For the Blue Hour, experiment with slightly cooler manual settings to accentuate the deep blues.
ISO and Shutter Speed
Balancing ISO and shutter speed is crucial for managing the varying light levels. During the Golden Hour, light is still abundant, allowing for relatively low ISO settings (e.g., ISO 100 or 200) to minimize noise, especially if using ND filters for video. For stills, you can use a higher shutter speed to freeze motion. As you transition into the dimmer Blue Hour, you may need to increase your ISO (e.g., ISO 400-800, potentially up to 1200 depending on your drone’s sensor) to compensate for the lack of light, but always aim for the lowest possible ISO to maintain image quality. Correspondingly, a slower shutter speed might be necessary for blue hour stills, although this isn’t always feasible for dynamic drone flight. For aperture, drones typically have fixed apertures, but if yours is adjustable, a wider aperture (smaller f-number) can help gather more light in dimmer conditions.
Shooting RAW
Always shoot your photos in RAW format when possible. Unlike JPEGs, which compress and process image data in-camera, RAW files retain all the original sensor data. This provides significantly more latitude for adjustments in post-processing, such as correcting white balance, recovering highlights, lifting shadows, and fine-tuning colors without degrading image quality. This flexibility is invaluable when working with the often challenging yet rewarding light of the Golden and Blue Hours.
Essential Tips for Golden and Blue Hour Drone Flights
Beyond technical settings, a strategic approach to your drone flight can make all the difference in harnessing these magical lighting periods.
Timing is Everything
These “hours” are rarely a full 60 minutes and vary significantly by season and your geographical latitude. The window for optimal light can be surprisingly short. Use dedicated Golden Hour or Blue Hour apps (available for iOS and Android) or simple online calculators to pinpoint the precise sunrise and sunset times for your location. Aim to be airborne 15-30 minutes before the start of your desired “hour” to allow for setup and initial positioning, ensuring you don’t miss the peak moments.
Pre-Flight Preparation
Thorough preparation is paramount. Ensure all your drone batteries are fully charged, and you have fresh, high-capacity SD cards. Crucially, check the weather forecast for wind speed, rain, and temperature. Drones are susceptible to wind, which can ruin smooth shots and pose safety risks. Optimal conditions involve calm winds and dry weather. Colder temperatures can also significantly reduce battery life, so plan accordingly.
Composition & Angles
The low-angle sun during Golden Hour presents incredible opportunities for dynamic composition. Look for ways to use foreground elements like trees, arches, or unique structures to create layers or striking silhouettes against the vibrant sky. Don’t shy away from shooting directly into the sun—with caution and proper exposure bracketing—as this can produce stunning lens flares and sunburst effects that add character to your imagery. However, also be mindful of your drone’s shadow; it can easily sneak into your frame and distract from the subject, especially when the sun is low. For Blue Hour, focus on compositions that highlight the cool light, perhaps contrasting it with artificial light sources like city lights or car trails.
Flight Path Planning (Waypoints)
For video, smooth and deliberate camera movements are key to cinematic results. If your drone features waypoint flying or intelligent flight modes, utilize them to plan precise flight paths. This allows for repeatable, fluid motions, ensuring consistency in your footage and freeing you to focus on camera settings and composition. Test your planned routes during daylight to refine angles and pacing.
Post-Processing
The magic doesn’t end when your drone lands. Post-processing is an integral part of enhancing Golden and Blue Hour photography. Even with perfect in-camera settings, careful adjustments to exposure, contrast, white balance, and color saturation in software like Lightroom or Photoshop can bring out the full richness and impact of the light you captured. Don’t be afraid to experiment with your RAW files to truly make your images shine.
“The Golden Hour and Blue Hour aren’t just times of day; they are creative opportunities. As drone pilots, we have the unique ability to capture these fleeting moments from breathtaking aerial perspectives, adding an almost painterly quality to our work.” – Sarah Chen, Aerial Photography Specialist
Challenges and Considerations
While undeniably beautiful, flying during these magic hours comes with its own set of challenges. The rapidly changing light means you need to work quickly and efficiently. What was a perfect exposure one minute might be underexposed or overexposed just a few minutes later. Weather conditions remain a critical factor; even a slight increase in wind can destabilize your drone and blur your shots. Additionally, low light conditions, especially during the Blue Hour, can reduce your visual line of sight, making it harder to track your drone and avoid obstacles. Always prioritize safety and adhere to local drone regulations, which may have specific rules regarding low-light or night flights.
Conclusion
The Golden and Blue Hours offer drone photographers an unparalleled opportunity to capture truly spectacular aerial imagery. By understanding the unique qualities of light during these periods, optimizing your drone’s camera settings with tools like ND filters and AEB, and meticulously planning your flights, you can transform ordinary scenes into extraordinary works of art. Embrace the commitment it takes to capture these fleeting moments, combining technical skill with artistic vision. So, charge your batteries, check the forecast, and prepare to elevate your drone photography to new, luminous heights. What will you create when you next catch the perfect light?
Frequently Asked Questions
How long do golden and blue hour last?
The duration of the Golden and Blue Hours is not a fixed 60 minutes and varies based on your location’s latitude and the time of year. Generally, the Golden Hour is the period approximately 30-60 minutes after sunrise and 30-60 minutes before sunset. The Blue Hour occurs just before the Golden Hour in the morning and just after it in the evening, lasting roughly 20-40 minutes each time. Using specialized apps can help you pinpoint the exact timings for your specific location and date.
Can I fly my drone at night?
Yes, under current regulations in many regions, recreational and commercial drone pilots can fly at night, provided the drone is equipped with proper anti-collision lighting that is visible for several miles. While regulations have eased, flying at night still presents challenges such as reduced visibility for the pilot, making it harder to maintain visual line of sight and avoid obstacles. It’s often not recommended for beginners due to the increased difficulty in control and safety.
What are the best drones for low-light photography?
For optimal low-light performance during Golden and Blue Hour, look for drones equipped with larger camera sensors (e.g., 1-inch sensors or larger) and cameras that offer good ISO performance with minimal noise at higher sensitivities. Drones with adjustable apertures (though less common) can also be beneficial. Popular options from brands like DJI (e.g., Mavic 3 series, Air series) often excel in these conditions due to their advanced camera technology and image processing capabilities.