Every aspiring filmmaker and content creator dreams of capturing footage that possesses the captivating, polished quality seen in professional movies. You know the look: fluid motion, beautiful depth, and rich colors that tell a story without a single word. Achieving this “cinematic” aesthetic isn’t about owning the most expensive gear; it’s about understanding and expertly manipulating your camera settings. This comprehensive guide will walk you through the essential adjustments and techniques to elevate your video production, transforming choppy, amateur-looking clips into smooth, visually stunning narratives.
Understanding the “Cinematic Look”
What exactly makes video footage look “cinematic”? It’s a combination of several visual cues that have been ingrained in our minds by decades of film history. Primarily, it involves a natural representation of motion blur, a selective focus that guides the viewer’s eye, rich and malleable color information, and a distinct aspect ratio. When these elements align, your footage transcends mere recording and takes on the artistry of storytelling, creating an immersive and visually appealing experience for your audience.
The Exposure Triangle for Cinematic Video
Just like photography, video exposure relies on the interplay of three fundamental settings: frame rate, shutter speed, and aperture. However, their roles are slightly different when aiming for a cinematic aesthetic.
Frame Rate (FPS): The Foundation of Motion
|
Our Picks for the Best Drone in 2026
As an Amazon Associate I earn from qualifying purchases.
|
||
| Num | Product | Action |
|---|---|---|
| 1 | DJI Mini 4K, Drone with 4K UHD Camera for Adults, Under 249 g, 3-Axis Gimbal Stabilization, 10km Video Transmission, Auto Return, Wind Resistance, 1 Battery for 31-Min Max Flight Time, Intelligent |

|
| 2 | Drone with Camera - Drone with Screen on Controller for Beginners, Foldable Remote Control Quadcopter with Gesture Control, 3D Flip, One Key Start, Emergency Stop, 2 Batteries, Easier to use to use |
|
| 3 | DJI Air 3S Fly More Combo (RC 2 Screen Remote Controller), Drone with 1" CMOS Wide-Angle & Medium Tele Camera for Adults, 4K/60fps, Omnidirectional Sensing & 3 Batteries for Extended Flight Time |
|
| 4 | DJI Mini 3 Fly More Combo (DJI RC), Drones with Camera for Adults 4K, 3 Batteries for 114-min Flight Time, Vertical Shooting, 32800ft (10km) Video Transmission, Lightweight Mini Drone for Beginners |
|
| 5 | Drone with 1080P Camera - Foldable Remote Control Quadcopter with Gesture Control, 3D Flip, One Key Start, Emergency Stop, 2 Batteries, Easier to use, Toy for Kids Adult Beginners |
|
| 6 | DJI Mini 4K Camera Drone Combo, Drone with 4K UHD Camera for Adults, Under 249 g, 3-Axis Gimbal Stabilization, 10km Video Transmission, Auto Return, 2 Batteries for 62-Min Max Flight Time, QuickShots |
|
| 7 | Drone with Camera for Adults 4K, Brushless Motor Drones for Kids Beginners, 60 Mins Flight, 130° Lens, FPV Foldable RC Quadcopter, Gesture Photography, Toys Gifts for Teen Boys Girls, Black |
|
| 8 | Drone with Camera, Drones for Adults and Beginners, 1080P HD FPV Foldable Mini Drones for Kids, with 2 Batteries, Carrying Case, Trajectory Flight, Gravity Control, One-Key Takeoff/Landing, 360° Flip, Toys for Gift |
|
| 9 | Drone with Camera 1080P HD FPV Foldable Mini Drone for Beginners Kids Adults, Drone with One Key Take Off/Landing, Gesture Selfie, Altitude Hold, 3D Flip, Easy to Fly, 2 Batteries, Toys for Boys Girls |
|
| 10 | GPS Drones with Camera for Adults 4K, FPV Drone Under 249g with Brushless Motor, GPS Auto Return, Follow Me, Circle Fly, Waypoint Flight, Foldable Drone with Gesture Control, 46Mins with 2 Batteries |
|
The frame rate, or frames per second (fps), dictates how many individual images your camera captures each second to create motion. This is perhaps the most critical initial setting for achieving a filmic look.
The standard frame rate for movies worldwide is 24fps (or 23.976fps). Why 24fps? This specific rate creates a subtle, natural motion blur that mimics how our eyes perceive movement in the real world, and it has been the industry standard for traditional cinema for decades. Our brains are accustomed to this look, automatically associating it with professional film. Shooting at 24fps is the primary step in giving your video that classic cinematic feel.
While 24fps is ideal for a narrative, film-like aesthetic, higher frame rates like 30fps, 60fps, or even 120fps serve different purposes. 30fps is common for broadcast television and provides a slightly sharper, more “live” look. Frame rates of 60fps or higher are perfect for capturing footage intended for slow motion. When slowed down in editing, these higher frame rates provide ample frames, resulting in incredibly smooth, fluid slow-motion sequences without any choppiness. For example, shooting at 60fps allows you to slow your footage down to 40% (if your timeline is 24fps) while retaining smooth motion.
Shutter Speed: Embracing the 180-Degree Rule
Once your frame rate is set, your shutter speed is the next crucial setting to adjust. The “180-degree shutter rule” is a fundamental principle in filmmaking that dictates your shutter speed should be approximately double your chosen frame rate.
For instance:
- If you’re shooting at 24fps, set your shutter speed to 1/48s or the closest available, typically 1/50s.
- If you’re shooting at 30fps, set your shutter speed to 1/60s.
- If you’re shooting at 60fps, set your shutter speed to 1/120s or 1/125s.
This rule is vital for achieving natural-looking motion blur. A shutter speed that is too fast (e.g., 1/2000s) will freeze motion, making your footage appear overly sharp, unnatural, and “jittery” – often described as the “video gamey” or “soap opera” effect. Conversely, a shutter speed that is too slow (e.g., 1/15s) will create excessive motion blur, making movements smear and lose detail. Adhering to the 180-degree rule ensures that fast-moving objects have just the right amount of blur, contributing significantly to the smooth, organic feel of cinematic video.
“For cinematic videos, the 180-degree shutter rule is key. This rule suggests that your shutter speed should be double your frame rate. For example, if you’re shooting at 24fps, set your shutter speed to 1/48s (or the nearest available setting, such as 1/50s on most cameras). This setting helps achieve the natural motion blur that contributes to the cinematic feel of your footage.”
Aperture: Crafting Depth of Field
Aperture, often expressed as an f-number (e.g., f/1.8, f/2.8, f/5.6), controls two main aspects of your image: the amount of light reaching your sensor and the depth of field. For a cinematic look, aperture primarily influences the depth of field, which is the range of distances in your image that appear acceptably sharp.
To achieve that sought-after “beautiful blurry background effect,” also known as bokeh, you need a shallow depth of field. This is created by using a wide-open aperture, meaning a lower f-number (e.g., f/1.8 or f/2.8). A wide aperture isolates your subject by blurring the foreground and background, drawing the viewer’s attention directly to the intended focus. This selective focus is a hallmark of cinematic storytelling, allowing you to create mood and direct narrative flow.
Using lenses with wide maximum apertures (often referred to as “fast” lenses) will give you the most control over depth of field. While kit lenses can make this more challenging, a trick to enhance the effect is to step back from your subject and zoom in with your lens, which compresses the background and helps create a shallower depth of field.
ISO: Keeping Your Footage Clean
ISO determines your camera’s sensitivity to light. While a higher ISO allows you to shoot in darker conditions, it comes at the cost of introducing digital noise or “grain” into your footage. For clean, professional-looking cinematic video, the general rule is to keep your ISO as low as possible.
Ideally, you want to use your camera’s native or base ISO, which is the setting where the sensor performs optimally with the least noise. This might be ISO 100, 200, 400, or even higher on some modern cinema cameras. If you find yourself in low-light situations, increasing the ISO is sometimes unavoidable. However, always try to balance it with your aperture and shutter speed to achieve proper exposure without excessively raising the ISO and degrading image quality. Prioritize lighting your scene well to minimize the need for high ISO settings.
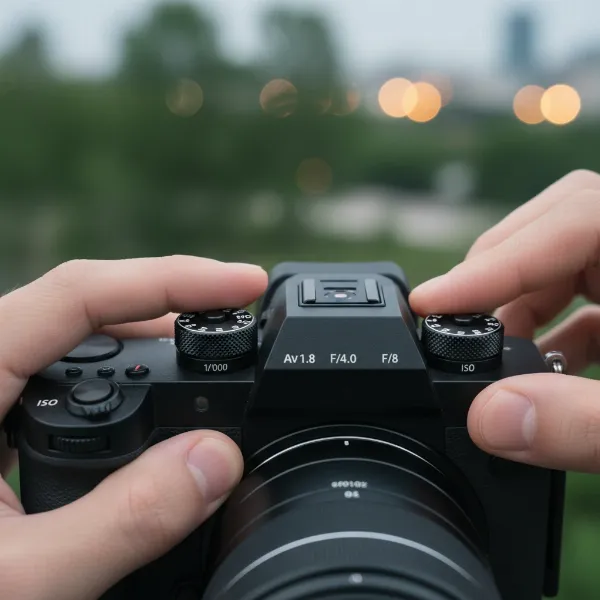 A person adjusting camera settings on a mirrorless camera for cinematic video, showing aperture, shutter speed, and ISO dials.
Beyond the Exposure Triangle: Advanced Settings & Tools
While the exposure triangle forms the core of cinematic video, several other settings and external tools are crucial for refining your look and maximizing your post-production flexibility.
Neutral Density (ND) Filters: Your Sunglasses for the Camera
Imagine shooting outdoors on a bright, sunny day. To maintain your wide-open aperture for a shallow depth of field and adhere to the 180-degree shutter rule for natural motion blur, your sensor would be flooded with too much light, resulting in severely overexposed footage. This is where Neutral Density (ND) filters become indispensable.
ND filters are essentially “sunglasses” for your camera lens. They reduce the amount of light entering the lens without affecting the color or contrast of your image. By attaching an ND filter, you can maintain your preferred cinematic settings (low f-number, slow shutter speed) even in bright conditions, allowing you to achieve proper exposure and preserve that smooth, filmic motion blur and beautiful bokeh. Variable ND filters are particularly useful, allowing you to adjust the light reduction on the fly.
Color Profiles (LOG/Flat): Maximizing Post-Production Potential
Professional filmmakers rarely shoot with “standard” color profiles that give a finalized, contrasty image directly out of the camera. Instead, they often use “flat” or “LOG” (logarithmic) picture profiles.
Log profiles (like Sony’s S-Log, Canon’s C-Log, Panasonic’s V-Log, or Fujifilm’s F-Log) capture a much wider dynamic range and retain more color information than standard profiles. This results in footage that looks desaturated and low in contrast straight out of the camera, appearing “flat”. However, this flat look is intentional: it provides immense flexibility during color grading in post-production. With more data to work with, you can manipulate colors, contrast, and highlights/shadows to achieve a specific cinematic look, apply creative LUTs (Look Up Tables), and correct color issues with far greater precision, making your footage truly shine. Shooting in 10-bit 4:2:2 or higher color depth further enhances this flexibility.
Resolution and Aspect Ratio: The Canvas for Your Story
The resolution of your video (e.g., 1080p, 4K, 8K) defines the detail and clarity of your image. While 1080p (Full HD) is perfectly capable of producing cinematic results, shooting in 4K or higher offers significant advantages. Higher resolutions provide more detail and greater flexibility for cropping, reframing, or stabilizing footage in post-production without losing quality. However, be mindful that 4K files are much larger and require more robust editing hardware.
The aspect ratio refers to the proportional relationship between the width and height of your image. The standard for most video content today is 16:9. However, many cinematic films utilize wider aspect ratios like 1.85:1 or 2.39:1 (anamorphic). These wider formats can enhance the cinematic feel by creating a more expansive visual experience, reminiscent of the silver screen. You can achieve this by setting a wider aspect ratio in-camera if available, or by cropping your 16:9 footage in post-production and adding black bars at the top and bottom, a technique known as “letterboxing.”
Techniques Beyond Settings for Ultimate Smoothness
While camera settings are fundamental, true cinematic smoothness also relies heavily on how you operate the camera and shape the scene.
Stable Camera Movement
Jerky, handheld footage rarely looks cinematic. Smooth, intentional camera movement is paramount. Invest in tools that aid stability:
- Tripods with Fluid Heads: Essential for static shots and smooth pans and tilts. Fluid heads provide resistance, allowing for controlled, glide-like movements.
- Gimbals/Stabilizers: These electronic devices use motors to counteract camera shake, producing incredibly smooth, floating shots even while moving. They are game-changers for dynamic cinematic sequences.
- Sliders and Dollies: For controlled linear movements, sliders offer short, precise glides, while dollies allow for longer, more elaborate tracking shots.
Practice your camera movements. Every pan, tilt, or track should be deliberate, starting and ending smoothly to avoid abruptness.
Lighting and Composition
Often considered more important than camera settings alone, effective lighting and thoughtful composition are the true “painting with light” elements of cinematography.
- Lighting: Master the art of lighting to create mood, depth, and separation between your subject and the background. Avoid flat, front-on lighting. Experiment with backlighting, side lighting, and three-point lighting setups to add dimension and visual interest. Cinematic lighting often uses shadows creatively to enhance drama and texture.
- Composition: The arrangement of elements within your frame significantly impacts the viewer’s experience. Utilize principles like the Rule of Thirds, leading lines, and negative space to create visually balanced and compelling shots. Think about your camera placement and angle – a low angle can make a subject appear powerful, while a high angle can make them seem vulnerable.
Lens Choices
While not a camera setting, your choice of lens dramatically affects the look of your video.
- Prime Lenses: Lenses with a fixed focal length (e.g., 50mm, 35mm) are often preferred for their superior sharpness, wider maximum apertures (lower f-numbers), and consistent image quality. Their wide apertures make achieving shallow depth of field much easier.
- Fast Lenses: Lenses with a low maximum f-number (e.g., f/1.4, f/1.8, f/2.8) are “fast” because they let in a lot of light, which is crucial for low-light shooting and, as discussed, for creating beautiful background blur.
While zoom lenses offer versatility, prime lenses often provide a more “cinematic” rendering due to their optical characteristics.
Bringing It All Together: Your Workflow for Cinematic Video
To consistently achieve smooth, cinematic video, adopt a structured workflow:
- Plan Your Shot: Before hitting record, consider your story, desired mood, and how camera movement, lighting, and composition will contribute.
- Set Your Frame Rate: Start with 24fps for a filmic look. If slow motion is desired, choose 60fps or 120fps.
- Apply the 180-Degree Shutter Rule: Double your frame rate for your shutter speed (e.g., 1/50s for 24fps).
- Adjust Aperture for Depth of Field: Select a low f-number (wide aperture) for shallow depth of field and bokeh, isolating your subject.
- Control Exposure with ND Filters: If shooting in bright light, use ND filters to maintain your desired aperture and shutter speed without overexposing.
- Set ISO as Low as Possible: Keep noise to a minimum by using your camera’s base ISO or the lowest possible while still achieving proper exposure.
- Choose a LOG/Flat Color Profile: Maximize your post-production flexibility for color grading.
- Stabilize Your Camera: Use a tripod, gimbal, or other stabilization tools for smooth movements.
- Light and Compose Carefully: Pay attention to lighting direction and frame your shots intentionally.
- Color Grade in Post-Production: Transform your flat-looking LOG footage into a vibrant, cinematic masterpiece.
Conclusion
Achieving smooth, cinematic video is an art that blends technical camera settings with creative visual storytelling. By mastering the fundamental principles of frame rate (starting with 24fps), adhering to the 180-degree shutter rule, controlling depth of field with aperture, and keeping your ISO low, you lay a robust technical foundation. Supplementing these settings with essential tools like ND filters, utilizing flat or LOG color profiles, and prioritizing stable camera movement, thoughtful lighting, and strong composition will truly elevate your craft. Remember, every setting and technique serves to enhance your narrative, inviting your audience deeper into the visual world you create. What story will you tell with your next cinematic shot?
Frequently Asked Questions
What is the most important setting for a cinematic look?
The most critical settings are a frame rate of 24fps combined with a shutter speed following the 180-degree rule (e.g., 1/50s). This combination creates the natural motion blur that is characteristic of traditional cinema and contributes significantly to the filmic aesthetic.
Can I achieve a cinematic look with a smartphone camera?
Yes, modern smartphones are increasingly capable. Many offer manual controls for frame rate and shutter speed, and some even allow for log profiles. While limitations exist, applying principles like the 180-degree rule, external stabilizers, and good lighting can significantly improve your smartphone footage.
Why does my video look choppy even at 24fps?
Choppy footage at 24fps often results from a shutter speed that is too fast, failing to create enough motion blur. Ensure your shutter speed is set to 1/48s or 1/50s. Also, quick, jerky camera movements without stabilization can appear choppy, even with correct settings.
Do I always need an ND filter for cinematic video?
You will almost always need an ND filter when shooting outdoors in bright conditions if you want to maintain a wide-open aperture (low f-number) and adhere to the 180-degree shutter rule. Without it, your footage would be severely overexposed, forcing you to compromise on your cinematic settings.
What is bokeh and how do I get it?
Bokeh refers to the aesthetic quality of the blur produced in the out-of-focus parts of an image. To achieve it, you need a shallow depth of field, which is created by using a wide-open aperture (low f-number like f/1.8 or f/2.8) and ideally a lens with a longer focal length.