Flying your drone along sandy coastlines offers breathtaking aerial photography and video opportunities, capturing the stunning beauty of beaches and oceans. However, this picturesque environment poses unique and significant threats to your valuable drone. Salt, fine sand, and pervasive moisture can quickly turn a memorable flight into a costly repair if proper maintenance isn’t performed. As an experienced drone technician, I’ve seen firsthand how these elements can damage even the most robust drones. Understanding how to clean your drone thoroughly after a beach flight is not just good practice; it’s crucial for its longevity and performance.
Why Beach Flying Demands Special Drone Care
|
Our Picks for the Best Drone in 2026
As an Amazon Associate I earn from qualifying purchases.
|
||
| Num | Product | Action |
|---|---|---|
| 1 | Drone with Camera - Drone with Screen on Controller for Beginners, Foldable Remote Control Quadcopter with Gesture Control, 3D Flip, One Key Start, Emergency Stop, 2 Batteries, Easier to use to use |

|
| 2 | Drone with Camera, Drones for Adults and Beginners, 1080P HD FPV Foldable Mini Drones for Kids, with 2 Batteries, Carrying Case, Trajectory Flight, Gravity Control, One-Key Takeoff/Landing, 360° Flip, Toys for Gift |
|
| 3 | Drone with Camera for Adults 4K, Brushless Motor Drones for Kids Beginners, 60 Mins Flight, 130° Lens, FPV Foldable RC Quadcopter, Gesture Photography, Toys Gifts for Teen Boys Girls, Black |
|
| 4 | Drone with 1080P Camera - Foldable Remote Control Quadcopter with Gesture Control, 3D Flip, One Key Start, Emergency Stop, 2 Batteries, Easier to use, Toy for Kids Adult Beginners |
|
| 5 | DJI Mini 4K Camera Drone Combo, Drone with 4K UHD Camera for Adults, Under 249 g, 3-Axis Gimbal Stabilization, 10km Video Transmission, Auto Return, 2 Batteries for 62-Min Max Flight Time, QuickShots |
|
| 6 | DJI Air 3S Fly More Combo (RC 2 Screen Remote Controller), Drone with 1" CMOS Wide-Angle & Medium Tele Camera for Adults, 4K/60fps, Omnidirectional Sensing & 3 Batteries for Extended Flight Time |
|
| 7 | Drone with Camera 1080P HD FPV Foldable Mini Drone for Beginners Kids Adults, Drone with One Key Take Off/Landing, Gesture Selfie, Altitude Hold, 3D Flip, Easy to Fly, 2 Batteries, Toys for Boys Girls |
|
| 8 | DJI Mini 3 Fly More Combo (DJI RC), Drones with Camera for Adults 4K, 3 Batteries for 114-min Flight Time, Vertical Shooting, 32800ft (10km) Video Transmission, Lightweight Mini Drone for Beginners |
|
| 9 | DJI Mini 4K, Drone with 4K UHD Camera for Adults, Under 249 g, 3-Axis Gimbal Stabilization, 10km Video Transmission, Auto Return, Wind Resistance, 1 Battery for 31-Min Max Flight Time, Intelligent |
|
| 10 | GPS Drones with Camera for Adults 4K, FPV Drone Under 249g with Brushless Motor, GPS Auto Return, Follow Me, Circle Fly, Waypoint Flight, Foldable Drone with Gesture Control, 46Mins with 2 Batteries |
|
The beach environment, with its salty air and fine sand, is a perfect storm for drone damage. Salt spray, carried by ocean breezes, can infiltrate every crevice of your drone, settling on electronic components, motors, and connectors. This salt is highly corrosive and can lead to rapid oxidation and short circuits if left unaddressed. Even if your drone doesn’t touch the water, the mere presence of salt in the air can initiate this corrosive process. 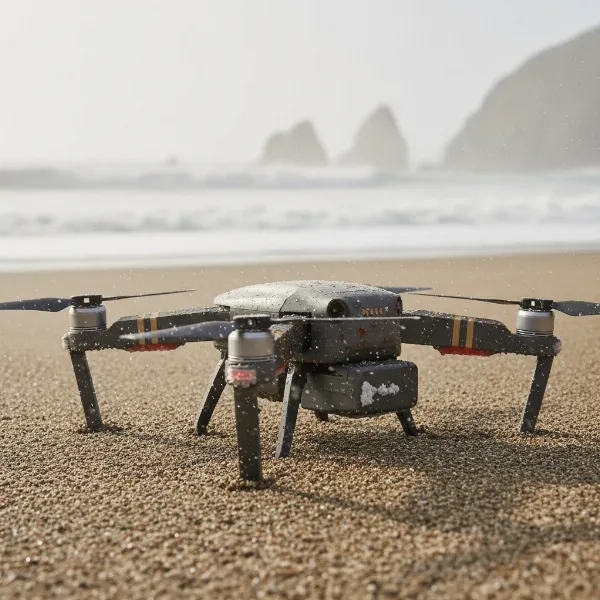 Drone covered in sand on a beach, illustrating potential damage
Beyond salt, the omnipresent sand is another formidable enemy. Fine grains can easily work their way into crucial moving parts like motors, gimbals, and cooling fans. Once inside, sand acts like sandpaper, grinding away at internal mechanisms, causing premature wear, reduced efficiency, and even complete seizure of parts. Some sands even contain magnetic particles that can be attracted to drone motors, potentially locking them up. Moreover, the high humidity near coastal areas exacerbates the risk of moisture-related corrosion, creating an environment where metal components rust much faster than in drier climates. Ignoring these threats can lead to irreversible damage, compromising your drone’s flight stability, camera functionality, and overall lifespan.
Essential Tools for a Thorough Drone Cleaning
To effectively combat the corrosive and abrasive effects of the beach environment, you’ll need a dedicated set of cleaning tools. Having these items on hand before you even head to the beach will ensure you’re prepared for immediate post-flight maintenance.
Here’s a comprehensive list of what you’ll need:
- Compressed Air: Canned air or a small air compressor is invaluable for blasting away loose sand and dust from the drone’s body, motors, and crevices. Use with caution around delicate parts to avoid freezing or forcing debris further in.
- Soft Brushes & Bellows: A soft-bristled brush (like a camel hair brush or an old toothbrush) helps dislodge stubborn sand, while a rubber air blower (bellows) provides a gentler, controlled puff of air for sensors and camera lenses.
- Microfiber Cloths: Essential for wiping down the drone’s body, propellers, and especially the camera lens without scratching. Keep several clean ones readily available.
- Isopropyl Alcohol (IPA): Opt for 90% or 99% concentration. IPA is crucial for cleaning electronic components as it displaces water, dissolves salt residues, and evaporates quickly without leaving conductive traces.
- Distilled Water: If your drone has had direct contact with saltwater, distilled water is vital for rinsing off corrosive salt without introducing new minerals. Tap water can be detrimental due to its mineral content.
- Lens Cleaning Kit: A specialized lens pen (with a brush and carbon cleaning tip) or lens cleaning fluid with a microfiber cloth is best for your drone’s delicate camera optics.
- Small Screwdrivers & Opening Tools: For more advanced cleaning, you might need to carefully open parts of your drone to access internal components, especially motors or gimbal assemblies.
- Anti-static Brush or Soft Bristle Toothbrush: For gently scrubbing circuit boards when cleaning with IPA.
- Desiccant Packs (Silica Gel): These can aid in absorbing residual moisture during the drying process.
Having these tools ready will enable you to perform a thorough cleaning, protecting your drone from the harsh beach elements.
Step-by-Step Guide: Cleaning Your Drone After Beach Exposure
After a thrilling flight by the sea, the real work begins. A methodical approach to cleaning is key to preventing long-term damage.
Immediate Post-Flight Actions
The moment your drone lands, or especially if it comes into contact with saltwater, time is of the essence.
- Power Off Immediately: Do not try to power on or test the drone if it’s wet or sandy.
- Remove Battery: Disconnect and remove the battery to prevent any electrical short circuits. This is the single most important step to prevent catastrophic damage.
- Preliminary Shake-off: Gently shake the drone to dislodge any loose, larger pieces of sand.
Removing Loose Sand and Debris
Begin with external surfaces to prevent sand from getting pushed deeper into the drone during subsequent steps.
- Compressed Air: Use compressed air or a powerful air blower to carefully blast away loose sand from the drone’s body, propeller arms, landing gear, and any visible vents. Hold the can upright and use short bursts to avoid moisture buildup or freezing delicate parts.
- Soft Brushing: Follow up with a soft brush to sweep away any remaining superficial sand or dust from the exterior shell.
Cleaning the Drone Body and Propellers
The main body and propellers often accumulate salt residue and fine sand.
- Damp Cloth Wipe: Lightly dampen a microfiber cloth with distilled water (or a very mild soap solution for stubborn grime). Gently wipe down the drone’s body and the surfaces of the propellers.
- Isopropyl Alcohol for Stains: For any stubborn salt streaks or greasy marks, apply a small amount of isopropyl alcohol to a clean microfiber cloth and wipe the affected areas.
Deep Cleaning Motors and Gimbal
These moving parts are highly susceptible to sand infiltration and require careful attention.
- Remove Propellers: Carefully detach all propellers to gain better access to the motors.
- Motor Cleaning: Use compressed air to blow into the motor housing openings. Rotate the motor bell manually while blowing to ensure sand is expelled from all angles. In rare cases where motors feel gritty or sound unusual, partial disassembly of the motor bell may be necessary to manually remove trapped sand.
- Gimbal Cleaning: The gimbal is extremely delicate. Use a soft brush and a bellows to gently remove any sand around the gimbal mechanism and camera lens. Never force movement or apply pressure to the gimbal. For the lens, use a dedicated lens cleaning pen: first, brush off coarse particles, then use the carbon-tipped side with radial motions to clean smudges.
Addressing Electronic Components (Saltwater Exposure)
If your drone had any direct contact with saltwater, immediate action on electronics is critical to halt corrosion.
- Distilled Water Rinse (If Submerged): If the drone was submerged in saltwater, before using IPA, you must rinse it with distilled water. This helps wash away the highly corrosive salt. Do not use tap water, as its minerals will only contribute to corrosion.
- Isopropyl Alcohol Bath/Brushing: Disassemble the drone carefully to expose the main circuit boards (flight controller, ESCs, etc.). Submerge affected boards in a bath of 90-99% isopropyl alcohol, or generously douse them while gently scrubbing with a soft, anti-static brush or soft bristle toothbrush. IPA displaces water and helps lift corrosive residues. Focus on connectors, solder joints, and exposed contacts.
Drying Your Drone Completely
Thorough drying is paramount before attempting to power on your drone.
- Air Drying: Allow your drone to air dry in a warm, dry, well-ventilated area. This can take anywhere from 6 to 24 hours, especially if water or vinegar was used.
- Desiccant Packs: Place the drone and its disassembled components in an airtight container with silica gel packets. These desiccants absorb ambient moisture and speed up the drying process.
- Avoid Heat: Never use a hairdryer or place your drone in direct, intense sunlight for prolonged periods. High heat can damage delicate electronic components, melt plastics, and potentially push trapped moisture deeper into the drone’s internal structure. For alcohol-only cleaning, 30-60 minutes may be sufficient for evaporation.
Preventing Future Damage: Proactive Maintenance Tips
While thorough cleaning is essential, proactive measures can significantly reduce the risk of damage during beach flights.
- Conformal Coating: Consider applying a conformal coating spray to exposed circuit boards and sensitive electronics. This specialized coating creates a protective, waterproof barrier against moisture, dust, and salt, significantly enhancing your drone’s resilience.
- Landing Pad: Always use a portable landing pad for takeoff and landing on sandy or dusty surfaces. This prevents sand from being kicked up by the propellers and ingested into the motors and body.
- Monitor Weather and Wind: Avoid flying your drone in strong winds near the coast, as this increases the amount of salt spray and sand that can hit your aircraft. Similarly, flying in misty or foggy conditions near saltwater will deposit moisture and salt.
- Regular Pre- and Post-Flight Inspections: Before each flight, visually inspect your drone for any signs of wear, loose components, or trapped debris. After every beach flight, perform a quick check to identify areas requiring immediate cleaning.
- Protective Cases: Transport your drone in a sealed, hard-shell case to protect it from sand and humidity during transit to and from the beach.
By adopting these proactive maintenance tips, you can enjoy more worry-free flights and extend the life of your drone, even in challenging coastal environments.
Common Mistakes to Avoid When Cleaning Your Drone
Even with the best intentions, certain cleaning methods can do more harm than good. Be aware of these common pitfalls:
- Using Tap Water on Electronics: Tap water contains minerals and impurities that can accelerate corrosion, especially after saltwater exposure. Always opt for distilled or de-ionized water for rinsing electronics.
- Pressure Washing: While effective for large, durable surfaces, the high pressure from a pressure washer can force water into delicate internal components, sensors, and seals, leading to immediate and severe damage. A gentle hose rinse is the maximum advisable, and only for drone models rated for it.
- Powering on a Wet Drone: This is perhaps the most critical mistake. Applying power to a drone with internal moisture or salt residue can cause instant short circuits, permanently damaging the electronics. Always ensure your drone is completely dry before reinserting the battery.
- Using Incorrect Cleaning Agents: Avoid using harsh chemical cleaners, abrasives, or lubricants like WD-40 on electronic components. WD-40 can be conductive, flammable, and may degrade plastics and rubbers over time. Stick to isopropyl alcohol for electronics and mild soap solutions for the drone’s exterior shell.
- Forgetting About Internal Corrosion: Salt and moisture can silently cause corrosion deep within the drone’s housing, even if the exterior looks clean. A superficial wipe-down is insufficient; internal inspection and cleaning are crucial after significant exposure.
Expert Insights on Drone Beach Maintenance
“After flying near the coast, the clock starts ticking for salt corrosion,” advises John Smith, a veteran drone technician with over a decade of experience. “The immediate priority isn’t just to dry it, but to neutralize and remove the salt before it causes irreversible damage. Isopropyl alcohol is your best friend for electronics, but a quick rinse with distilled water is non-negotiable if your drone took a dip in the ocean.”
> “The greatest enemy isn’t the crash, it’s the aftermath. Swift, precise cleaning with the right tools can be the difference between a minor inconvenience and having to replace your entire drone.” – Jane Doe, Lead Drone Repair Specialist at AeroFix Solutions
Conclusion: Safeguarding Your Aerial Investment
Flying your drone on the beach offers unparalleled opportunities to capture stunning visuals, but it also exposes your valuable equipment to some of the harshest environmental elements: corrosive salt, abrasive sand, and damaging moisture. By understanding these threats and implementing a meticulous post-flight cleaning regimen, you can significantly extend the lifespan and maintain the peak performance of your drone.
Remember to act swiftly after every beach excursion, focusing on removing loose debris, thoroughly cleaning the body, motors, gimbal, and especially the electronics with appropriate tools like compressed air, microfiber cloths, distilled water, and high-purity isopropyl alcohol. Proactive measures such as using a landing pad and considering conformal coatings can further fortify your drone against future encounters with coastal elements. Avoiding common mistakes like using harsh chemicals or attempting to power on a wet drone is equally critical. With diligent care, your drone will continue to soar and capture breathtaking moments for years to come.
What steps will you take to ensure your drone is always beach-ready and protected?
Frequently Asked Questions
What kind of alcohol is safe for drone electronics?
For drone electronics, always use high-purity isopropyl alcohol (IPA), preferably 90% concentration or higher. It evaporates quickly, displaces water, and effectively dissolves salt and residue without leaving conductive impurities. Avoid rubbing alcohol with lower concentrations or added ingredients, as these can leave harmful residues.
Can I use a hair dryer to dry my drone?
No, it is strongly advised not to use a hair dryer to dry your drone. The high heat can damage delicate electronic components, warp plastic parts, and, more importantly, can force moisture and corrosive salt particles deeper into the drone’s internal structure, leading to further damage. Air drying in a well-ventilated area or using desiccant packs is much safer.
How often should I clean my drone after beach flights?
You should perform a thorough cleaning immediately after every flight that involves exposure to a beach environment, whether it’s direct contact with sand or just flying in salty air. Salt and sand can cause damage rapidly, so timely cleaning is essential for preventing corrosion and mechanical wear.
What are the signs of salt corrosion on a drone?
Signs of salt corrosion include white, powdery, or greenish deposits on metal parts, connectors, and circuit boards. You might also notice rust, discoloration, or a gritty feeling in moving parts like motors and gimbals. In more severe cases, corrosion can lead to electrical malfunctions, erratic flight, or complete failure of components.