There’s little more frustrating for a drone enthusiast than powering up your drone and controller, only to find they refuse to connect. You’re ready to capture stunning aerial footage or simply enjoy a relaxing flight, but your drone remains stubbornly grounded. Connectivity issues are a surprisingly common hurdle, encountered by both beginners and seasoned pilots. It feels like your high-tech marvel has suddenly lost its ability to communicate, leaving you wondering where to even begin.
This comprehensive guide will walk you through the most common reasons why your drone and controller might not be syncing up and provide a clear, step-by-step troubleshooting process. We’ll delve into everything from simple checks to more advanced solutions, empowering you to diagnose and resolve these connection problems efficiently. Get ready to put your troubleshooting hat on and get your drone back in the air.
Understanding Drone-Controller Connectivity
Before diving into fixes, it helps to understand how your drone and its controller communicate. Most modern drones rely on radio frequencies (RF), often in the 2.4 GHz or 5.8 GHz bands, to establish a stable link. Some consumer drones might also utilize Wi-Fi or Bluetooth for closer-range control or app-based interaction. This wireless connection is the lifeline between your commands on the controller and the drone’s flight systems.
Several factors can disrupt this crucial communication pathway. These include insufficient power, signal interference from other electronic devices, outdated software or firmware, or incorrect pairing procedures. Essentially, anything that interrupts the “conversation” between your remote and the drone can lead to a connection failure. Identifying the root cause is the first step toward a successful resolution.
Initial Checks: The Basics of Connectivity
Often, the simplest solutions are the most effective. Before delving into more complex troubleshooting, begin with these fundamental checks.
Power and Battery Levels
A surprising number of connection issues stem from inadequate power.
- Drone Battery: Ensure your drone’s battery is fully charged. A low battery might not provide enough power to fully initiate the drone’s systems or maintain a stable connection. Check for any physical damage, such as swelling or dents, which could indicate a faulty battery.
- Controller Battery: Similarly, verify that your remote controller is fully charged. A depleted controller battery can prevent it from broadcasting a strong enough signal to pair with the drone.
- USB Devices: If you’re connecting a mobile device (phone or tablet) to your controller via a USB cable, ensure the mobile device also has sufficient charge.
|
Our Picks for the Best Drone in 2026
As an Amazon Associate I earn from qualifying purchases.
|
||
| Num | Product | Action |
|---|---|---|
| 1 | DJI Mini 3 Fly More Combo (DJI RC), Drones with Camera for Adults 4K, 3 Batteries for 114-min Flight Time, Vertical Shooting, 32800ft (10km) Video Transmission, Lightweight Mini Drone for Beginners |

|
| 2 | DJI Mini 4K, Drone with 4K UHD Camera for Adults, Under 249 g, 3-Axis Gimbal Stabilization, 10km Video Transmission, Auto Return, Wind Resistance, 1 Battery for 31-Min Max Flight Time, Intelligent |
|
| 3 | Drone with Camera for Adults 4K, Brushless Motor Drones for Kids Beginners, 60 Mins Flight, 130° Lens, FPV Foldable RC Quadcopter, Gesture Photography, Toys Gifts for Teen Boys Girls, Black |
|
| 4 | DJI Mini 4K Camera Drone Combo, Drone with 4K UHD Camera for Adults, Under 249 g, 3-Axis Gimbal Stabilization, 10km Video Transmission, Auto Return, 2 Batteries for 62-Min Max Flight Time, QuickShots |
|
| 5 | DJI Air 3S Fly More Combo (RC 2 Screen Remote Controller), Drone with 1" CMOS Wide-Angle & Medium Tele Camera for Adults, 4K/60fps, Omnidirectional Sensing & 3 Batteries for Extended Flight Time |
|
| 6 | Drone with Camera - Drone with Screen on Controller for Beginners, Foldable Remote Control Quadcopter with Gesture Control, 3D Flip, One Key Start, Emergency Stop, 2 Batteries, Easier to use to use |
|
| 7 | Drone with 1080P Camera - Foldable Remote Control Quadcopter with Gesture Control, 3D Flip, One Key Start, Emergency Stop, 2 Batteries, Easier to use, Toy for Kids Adult Beginners |
|
| 8 | GPS Drones with Camera for Adults 4K, FPV Drone Under 249g with Brushless Motor, GPS Auto Return, Follow Me, Circle Fly, Waypoint Flight, Foldable Drone with Gesture Control, 46Mins with 2 Batteries |
|
| 9 | Drone with Camera 1080P HD FPV Foldable Mini Drone for Beginners Kids Adults, Drone with One Key Take Off/Landing, Gesture Selfie, Altitude Hold, 3D Flip, Easy to Fly, 2 Batteries, Toys for Boys Girls |
|
| 10 | Drone with Camera, Drones for Adults and Beginners, 1080P HD FPV Foldable Mini Drones for Kids, with 2 Batteries, Carrying Case, Trajectory Flight, Gravity Control, One-Key Takeoff/Landing, 360° Flip, Toys for Gift |
|
Proximity and Line of Sight
Drones and controllers typically require a certain proximity, especially during the initial pairing process.
- Keep Them Close: During pairing attempts, keep the drone and controller within a few feet of each other.
- Maintain Line of Sight: Ensure there are no major physical obstructions between the drone and the controller. Walls, trees, or large metal objects can block or weaken the radio signal, hindering connection.
Obstacles and Interference
Wireless signals are susceptible to interference.
- Environmental Factors: Radio interference from other electronic devices, Wi-Fi routers, high-voltage power lines, or even other drone pilots in the vicinity can disrupt your drone’s signal.
- Location, Location, Location: Try moving to an open area, away from buildings and other electronics, to rule out environmental interference.
Checking for Visible Damage
A quick visual inspection can sometimes reveal obvious issues.
- Antennas: Check the antennas on both your drone and controller (if external) for any bends, breaks, or loose connections.
- Cables and Ports: If your setup involves a USB cable connecting your mobile device to the controller, inspect the cable for fraying or damage, and ensure the ports are clean and secure. Many USB-C and Micro-USB cables are power-only; make sure you’re using a data-capable cable.
Step-by-Step Troubleshooting Guide for Connection Issues
If the basic checks didn’t resolve the problem, it’s time to systematically work through these common troubleshooting steps.
1. Restart Both Devices
Often, a simple reboot can clear minor software glitches.
- Power Cycle: Completely power off your drone, controller, and any connected mobile device.
- Wait: Give it about 10-15 seconds for all systems to fully reset.
- Power On Sequence: Turn on your controller first, then power on your drone. Wait for both devices to initialize before attempting to connect. For setups involving a mobile device, connect it to the controller only after the controller is powered on.
2. Re-Pairing the Drone and Controller
If the connection is lost, you may need to re-establish the pairing.
- Consult Your Manual: Every drone has a specific pairing procedure outlined in its user manual. This is your definitive guide. It often involves pressing a sequence of buttons on the controller and/or drone, or using the drone’s companion app.
- General Steps: Typically, you’ll power on the drone, then the controller, and then initiate a “binding” or “pairing” mode on both devices within a specific timeframe. Look for flashing lights on your drone or controller that indicate pairing mode.
- App-Based Pairing: Many modern drones use a mobile app to facilitate pairing. Follow the in-app instructions carefully.
3. Check for Firmware Updates
Outdated firmware is a frequent cause of compatibility and connection problems.
- Importance of Updates: Manufacturers regularly release firmware updates to improve performance, add features, and fix bugs, including connectivity issues.
- How to Update: Use the drone’s official mobile app or visit the manufacturer’s website to check for and install the latest firmware for both your drone and your controller. Ensure you have a stable internet connection and sufficient battery charge during the update process.
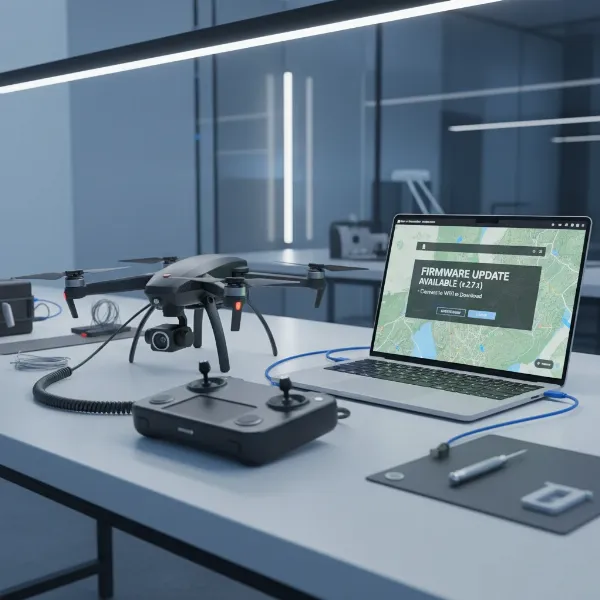 Drone and controller connected to a computer for firmware update
4. Inspecting Antenna and Cables
Physical connections are critical for reliable communication.
- Controller Antennas: For controllers with external antennas, ensure they are fully extended and positioned correctly, ideally pointed towards the general direction of the drone (though line of sight is generally more important).
- Mobile Device Cables: If you connect a phone or tablet to your controller, check the USB cable. As mentioned, not all cables transfer data. Try a different, known data-capable USB cable. Also, try connecting it to different ports on your controller (some controllers have specific data ports, or one might be faulty). Ensure your phone case isn’t preventing the cable from fully seating.
5. Dealing with Interference
Radio interference can be a silent saboteur of your drone connection.
- Identify Sources: Common sources of interference include Wi-Fi networks (especially crowded ones), Bluetooth devices, microwaves, high-voltage power lines, radio towers, and even large metal structures.
- Change Location: The easiest fix is to move to a different, more open flying location, away from potential sources of electromagnetic interference.
- Frequency Bands: Many drones operate on both 2.4 GHz and 5.8 GHz frequencies. If your drone supports it, try switching to the 5.8 GHz band, which is often less congested than 2.4 GHz. Consult your drone’s app or manual for instructions on how to change frequency settings.
6. Calibrating the Controller
While primarily for flight accuracy, sometimes a controller calibration can resolve underlying communication glitches.
- When to Calibrate: If your drone is drifting or behaving erratically in addition to connection issues, calibration might be necessary.
- Procedure: Follow your drone’s manual for specific controller calibration steps. This often involves moving joysticks and dials through their full range of motion.
7. App-Related Issues
For drones that rely on a companion mobile app for operation, the app itself can be a source of problems.
- Latest Version: Ensure you are using the correct and latest version of the manufacturer’s app. Check your phone’s app store for updates.
- Clear Cache/Reinstall: Try clearing the app’s cache and data or even reinstalling the app entirely. This can resolve corrupted files or settings.
- Background Apps: Make sure no other drone-related apps (e.g., DJI GO, DJI Fly, Dronelink, or third-party flight planning apps) are running in the background, as they can sometimes interfere with the active app’s connection.
- Permissions (Android): On Android devices, ensure the drone app has all necessary permissions granted (location, storage, etc.). Enabling “USB Debugging” in your Android developer options might also be required for some connections.
8. Battery Health
Beyond simply being charged, the overall health of your batteries matters.
- Degraded Performance: Over time, drone and controller batteries can degrade, losing their ability to hold a stable charge or deliver consistent power.
- Testing: If you suspect a battery issue, observe its performance. Does it drain unusually fast? Does it feel warm or swollen? Consider replacing older batteries if other troubleshooting steps fail.
Advanced Troubleshooting and When to Seek Professional Help
If the above steps haven’t solved your connection problem, it might be time for more drastic measures or professional intervention.
Factory Reset
A factory reset reverts your drone and controller to their original settings, clearing any corrupted configurations.
- Use with Caution: This is a last resort, as it will wipe all customized settings, flight logs, and potentially stored media.
- Manual is Key: Consult your drone’s user manual for the precise instructions on how to perform a factory reset for both the drone and the controller.
Checking for Internal Hardware Issues
If your drone has recently experienced a crash or a hard landing, internal components could be damaged. This might include damaged wiring, a faulty radio module, or a disconnected antenna inside the casing.
Contacting Customer Support
If you’ve exhausted all troubleshooting options, it’s time to reach out to the drone manufacturer’s customer support. Be prepared to provide:
- Your drone model and serial number.
- A detailed description of the problem and the steps you’ve already taken.
- Any error messages or indicator light patterns you’ve observed.
Warranty Considerations
Before attempting any invasive repairs, check your drone’s warranty. Opening the drone or making unauthorized modifications could void your warranty, impacting your ability to get professional repair or replacement.
Preventive Measures for Reliable Drone Connectivity
Prevention is always better than cure. By adopting these best practices, you can minimize future connection headaches.
- Pre-Flight Checklists: Always perform a quick checklist before each flight: ensure batteries are charged, antennas are positioned, and no obvious damage is present.
- Regular Maintenance and Updates: Keep both your drone and controller firmware up to date. Regularly inspect all components, including propellers, motors, and landing gear.
- Best Practices for Storage and Handling: Store your drone and controller in a safe, dry environment. Avoid extreme temperatures and always use a protective case during transport. Handle them with care to prevent accidental drops or impacts.
- Understand Your Drone’s Quirks: Each drone model might have specific connectivity nuances or known sensitivities. Familiarize yourself with your specific model’s manual and online forums for model-specific tips.
Conclusion
A drone that refuses to connect to its controller can turn an exciting flight into a frustrating ordeal. However, by systematically approaching the problem with patience and following these comprehensive troubleshooting steps, you can often diagnose and resolve the issue yourself. From checking basic power levels and performing simple reboots to delving into firmware updates and app configurations, most connectivity problems have a straightforward solution. Remember to always consult your user manual for model-specific instructions and prioritize safety in all your drone operations.
What’s the most unusual drone connectivity fix you’ve ever encountered?
Frequently Asked Questions
My drone connects briefly then disconnects immediately. What could be the cause?
This often points to signal interference, an outdated app version, or a faulty USB cable (if connecting to a mobile device). Try moving to a clearer location, updating your app and firmware, and replacing the USB cable with a data-capable one to see if the connection stabilizes.
How often should I update my drone’s firmware?
It’s generally recommended to update your drone’s firmware (and controller firmware) whenever a new version is released by the manufacturer. These updates often include critical bug fixes, performance enhancements, and improved compatibility, which can prevent connectivity issues and other problems.
Can a damaged propeller affect my drone’s connection?
While a damaged propeller primarily affects flight stability and motor performance, in severe cases, vibrations from an unbalanced propeller could potentially cause minor internal component shifts or disruptions that indirectly impact the connection. However, it’s less likely to be a direct cause of a connection failure compared to battery or signal issues.
My drone is connecting to the controller, but I don’t see video feed. What should I do?
This is typically a separate issue from drone-controller pairing. Check your mobile device’s connection to the controller (USB cable, Wi-Fi), ensure the drone’s camera is functioning, and verify that the drone app has camera permissions. Also, check for specific video transmission settings or firmware updates related to the video system.
Is it always best to turn on the controller before the drone?
Yes, for most drone systems, the recommended power-on sequence is to turn on the remote controller first, allow it to fully initialize, and then power on the drone. This ensures the controller is ready to establish a link as soon as the drone’s systems come online. Reversing this sequence can sometimes lead to connection delays or failures.