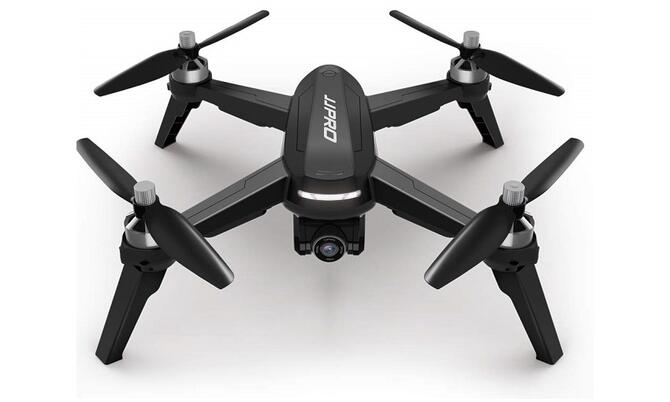
Hey there, fellow pilot. We’ve all been there. You’ve just wrapped up an exhilarating flight, maybe pushed the limits a little, or had a slightly less-than-graceful landing against a rogue tree branch. Your heart sinks for a second. Is everything okay? Before you even check the camera or the landing gear, your eyes probably go straight to the props. Knowing How To Tell If A Drone Propeller Is Damaged is one of the most fundamental and non-negotiable skills in any pilot’s toolkit. It’s not just about performance; it’s about the safety of your drone and everyone around it. Think of your propellers as the wings of your aircraft. Even the slightest imperfection can turn a stable flight into an unpredictable disaster. Let’s walk through exactly what you need to look for, from the obvious cracks to the subtle clues your drone gives you.
Why Even a Tiny Nick Matters: The Aerodynamics of a Propeller
First off, let’s get one thing straight: a drone propeller isn’t just a simple piece of spinning plastic. It’s a precisely engineered airfoil, designed to slice through the air with maximum efficiency and minimal vibration. When you introduce damage—even a tiny nick or a slight bend—you throw that perfect balance completely out of whack.
This imbalance creates a cascade of problems:
- Increased Vibration: A damaged prop spins unevenly, creating vibrations that travel through the motor and the entire drone frame. This is the number one cause of that dreaded “jello” effect in your videos.
- Motor Strain: Your drone’s motors have to work overtime to compensate for the inefficiency of a damaged prop, leading to overheating and a shorter lifespan.
- Reduced Flight Performance: You’ll notice less stability, decreased responsiveness, and shorter flight times as the drone burns more battery power just to stay level.
- Catastrophic Failure: The most significant risk. A small crack can become a complete fracture under the intense rotational stress of flight (we’re talking thousands of RPMs). A prop shattering mid-air almost always results in an immediate, uncontrollable crash.
As aviation expert Michael Vance often says, “An aircraft is only as good as its smallest component. For a drone, that component is often the propeller tip.”
The Visual Inspection: Your First Line of Defense
Your eyes are your best tool. A thorough visual check should be a non-negotiable part of your pre-flight and post-flight routine. Take each propeller off and inspect it individually in good light.
Look for Nicks, Cracks, and Chips
This is the most common type of damage. Run your finger gently along the leading and trailing edges of each blade.
- Nicks and Dents: Often caused by clipping grass, leaves, or small twigs. While a very minor scuff on the flat surface might be okay, any damage to the thin edges can disrupt airflow.
- Cracks: These are the real danger signs. Pay close attention to the area where the blade meets the central hub. This is a high-stress point. Any visible line, no matter how small, is grounds for immediate replacement.
- Chips: If a piece of the propeller tip is missing, it’s a definite no-go. The prop is now severely unbalanced and unsafe to fly.
Check for Bending and Warping
Place the propeller on a perfectly flat surface, like a glass table.
- Does it lie completely flat?
- Do the tips curve up or down unnaturally?
- Compare it to a brand-new propeller. The difference can sometimes be subtle.
Heat can cause propellers to warp over time, especially if stored improperly (like in a hot car). A bent or warped prop is aerodynamically compromised and will cause significant vibration.
Inspect the Hub and Mounting Points
The central part of the propeller is just as important as the blades. Check the mounting hole for any signs of stress whitening (a milky or pale appearance in the plastic), cracks, or deformation. If the hub is damaged, the prop won’t sit securely on the motor, leading to dangerous vibrations and potential detachment during flight.
The Touch Test: Feeling for Flaws
Sometimes, you can feel damage that you can’t easily see. After you’ve done your visual check, run your fingertip along the entire surface and edges of the propeller. You’re feeling for:
- Rough Patches: Any area that isn’t perfectly smooth is a sign of abrasion that can affect airflow.
- Stress Lines: You might feel a faint ridge that isn’t visible. This could be a sign of a stress fracture forming beneath the surface.
- Flexibility: Gently try to flex the blade. It should feel firm and spring back instantly. If it feels unusually soft, brittle, or “creaky,” the plastic integrity might be compromised.
Pilot’s Tip: Get into the habit of handling your new, perfect propellers. The more you understand how they should feel, the faster you’ll recognize when something feels wrong.
The Sound Check: Listening for Trouble in the Air
Your ears are an underrated diagnostic tool. A healthy drone has a specific sound—a clean, consistent hum. Damaged props change that sound. Listen for:
- A High-Pitched Whine: This can indicate a prop is unbalanced or warped, forcing the motor to spin at a slightly different, more strained frequency.
- An Unusually Loud or “Angry” Buzz: This is often a dead giveaway for severe vibrations caused by a damaged prop. It will sound different from the other three motors.
- A Rhythmic “Wub-Wub” Sound: If one prop is bent, it can create a pulsating noise as it spins, disrupting the air differently on each rotation.
If you notice a sudden change in your drone’s sound profile during a flight, it’s best to land immediately and perform a full inspection.
A Step-by-Step Guide: How to Tell If a Drone Propeller Is Damaged
Feeling a bit overwhelmed? Let’s break it down into a simple checklist. Perform this before every single flight.
- Remove Propellers: For the best inspection, take the props off the drone. This allows you to see the hub and examine each blade from all angles.
- Clean Them: Wipe each propeller with a soft, microfiber cloth. Dirt and grass stains can hide underlying damage.
- Visual Check: Hold each prop up to a light source. Look for any nicks, chips, cracks, or stress lines, paying special attention to the edges and the hub.
- Flatness Test: Lay the prop on a known flat surface to check for any bending or warping.
- Touch Test: Run your finger along all surfaces and edges. Feel for any roughness, ridges, or unusual flexibility.
- Re-mount and Wiggle: Mount the propeller back onto the motor. It should fit snugly. Give it a gentle wiggle; there should be no play or looseness at the hub.
- Listen on Start-up: Before taking off, arm your drone and let the props spin at low RPMs for a few seconds. Listen carefully for any unusual or inconsistent sounds.
When in Doubt, Throw It Out: The Golden Rule of Propellers
This is the most important piece of advice in this entire article. Propellers are inexpensive, disposable components. Your drone is not. A pack of new props might cost you $10-$20. A new drone, or repairing damage from a crash, can cost hundreds or even thousands.
There is no such thing as a “mostly okay” propeller. If you have any suspicion—any at all—that a propeller might be damaged, replace it. It is never, ever worth the risk.
Think of it like a car tire with a bulge in the sidewall. Sure, you might be able to drive on it for a while, but you’re operating on borrowed time. The smart move is always to replace it before it fails.
Frequently Asked Questions
Q: Can I fly with a slightly chipped drone propeller?
A: No, you should never fly with a chipped propeller. A chip, no matter how small, creates a significant imbalance that causes harmful vibrations, strains the motor, and can lead to a catastrophic failure of the blade in mid-air. Always replace it.
Q: How often should I replace my drone propellers?
A: There is no fixed schedule. You should replace them immediately upon noticing any signs of damage. Even if they look fine, some pilots choose to replace all their props after a set number of flight hours (e.g., 50-100 hours) as a preventative measure against material fatigue.
Q: Can I repair a damaged drone propeller?
A: Absolutely not. Attempting to sand, glue, or otherwise “fix” a propeller is extremely dangerous. You cannot restore its original aerodynamic balance or structural integrity. Doing so creates a massive and unacceptable safety risk.
Q: Do carbon fiber propellers damage as easily as plastic ones?
A: Carbon fiber propellers are much stiffer and more durable than standard plastic ones, so they resist bending and minor nicks better. However, they are more brittle. Instead of bending on a hard impact, they are more likely to crack or shatter, so the same rigorous inspection is required.
Q: What is the most common cause of propeller damage?
A: The most common causes are “prop strikes,” which happen during rough landings, clipping objects like tree branches or tall grass, and transport damage. Storing your drone in a case where propellers can be bent or pressed against other objects is a frequent source of unseen damage.
Final Thoughts: Fly Smart, Fly Safe
Mastering how to tell if a drone propeller is damaged is a critical step in your journey from a casual flyer to a confident, responsible pilot. It’s a simple process that takes only a couple of minutes but can save you from a world of heartache and expensive repairs. Your propellers are the unsung heroes of every incredible shot you capture and every thrilling flight you experience. Treat them with respect, inspect them religiously, and never hesitate to swap them out for a fresh set. Now go out there, do your checks, and enjoy the skies safely.